How to set up DNS records at Dynadot (MX, TXT, @, A, CNAME)
This is a detailed guide on how to set up DNS records at Dynadot. Sometimes setting up your DNS record can give you a hard time, and if you mess up the records your domain may not function properly causing all kinds of errors on your website.
That is why is necessary to know how to set up Dynadot DNS records. Note that each domain registrar has a different design of their DNS management panel, however, the concept is the same.
Dynadot domain registrar offers one of the best domain services and their prices are constant, so you don’t have to worry about expensive renewal or hidden costs. looking for hosting, here is a list of the best web hosting providers.
I have been using Dynadot for a while now to manage over 8 domain names. So far the service has been excellent. Their dashboard and mobile app are so professional and make it easy for me to easily manage everything from anywhere.
How to add A record in Dynadot
To set up A record on Dynadot, you will need to follow the following steps.
- First, login into your Dynadot account.
- Click on the “My Domains” button then click on the “Manage Domain” button under the My Domains link.
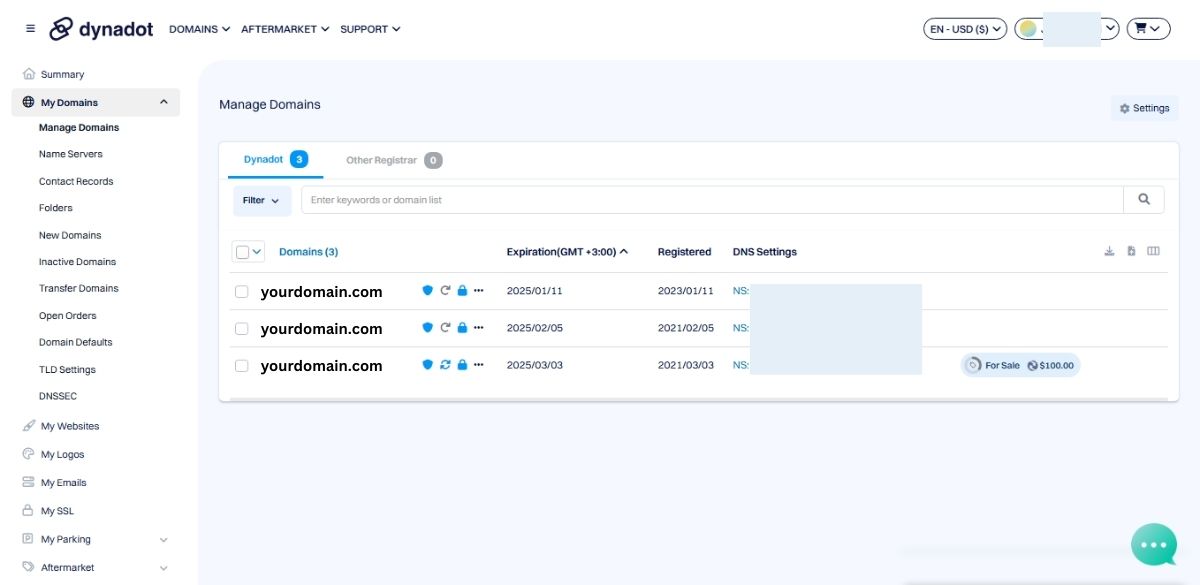
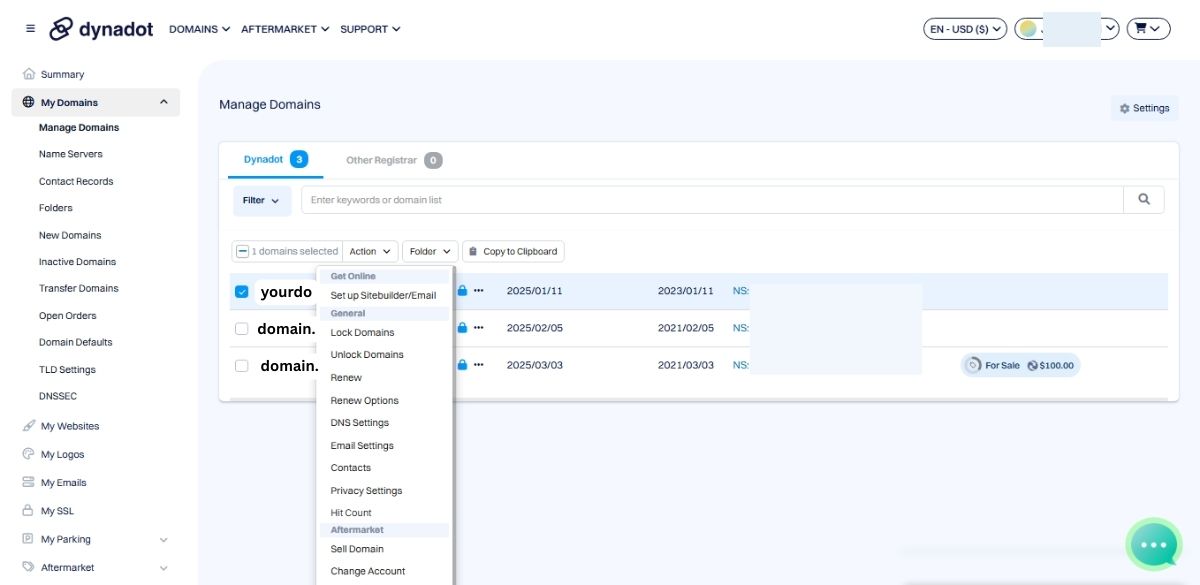
- Now click on the box next to your domain name, and then click on the “Bulk Action” button above.
- On the “bulk” button Choose “DNS Settings” from the drop-down list.
- Under the “Domain Record” section, select “A” as the record type from the “Record Type” drop-down.
- If you want to set a record on the root @ of your domain, then choose the “A” record and add your IP address on the “IP Address or Target Host”. Note that @ means you are adding a record directly to your domain, hence on Dynadot, that option is added by default on the “Domain Record (required)” section.
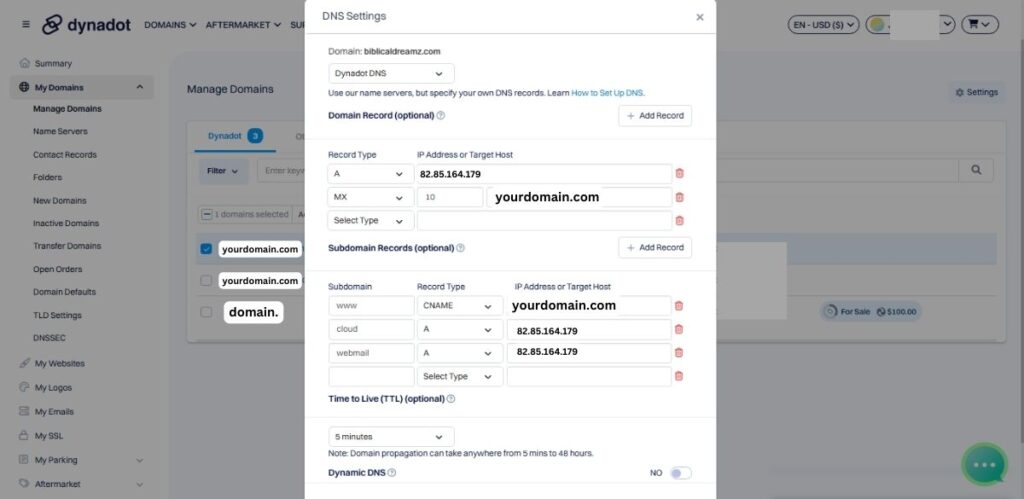
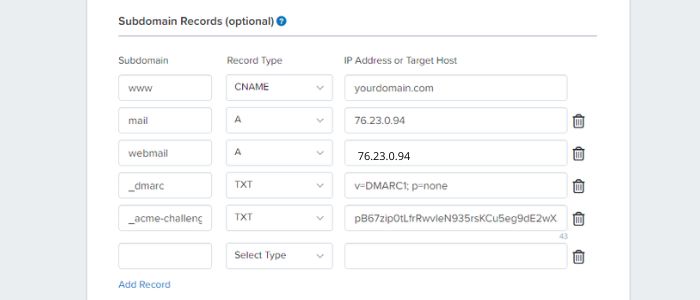
- Enter other “A” records such as mail or webmail in the “Subdomain Records (optional)” section.
- Enter your subdomain name e.g. mail, on the “Subdomain” box, choose the “A” record on the “Record Type” box, and lastly enter your A record on the “IP Address or Target Host” box.
- Once you are done press the “Save DNS” button to save your changes. Note that, the changes can take anywhere from 5 minutes to 48 hours to fully propagate.
How to add MX record at Dynadot
To set up MX record on Dynadot, you will need to follow the following steps.
- First, login into your Dynadot account.
- Click on the “My Domains” button then click on the “Manage Domain” button under the “My Domains” link.
- Now click on the box next to your domain name, and then click on the “Bulk Action” button above.
- On the “bulk” button choose “DNS Settings” from the drop-down list.
- Under the “Domain Record” section, select “MX” as the record type from the “Record Type” drop-down.
- Now enter your MX record in the “Host” box on the “IP Address or Target Host” section, and add the record’s priority in the “Distance” box.
- Once you are done press the “Save DNS” button to save your changes. Note that, the changes can take anywhere from 5 minutes to 48 hours to fully propagate.
How to add CNAME record at Dynadot
To set up CNAME record on Dynadot, you will need to follow the following steps.
- First, login into your Dynadot account.
- Click on the “My Domains” button then click on the “Manage Domain” button under the My Domains link.
- Now click on the box next to your domain name, and then click on the “Bulk Action” button above.
- On the “bulk” button choose “DNS Settings” from the drop-down list.
- Under the “Subdomain Records” section, enter your subdomain name e.g. www on the “Subdomain” box, then select “CNAME” as the record type from the “Record Type” drop-down, and then add your CNAME record to the “IP Address or Target Host” box.
- Once you are done press the “Save DNS” button to save your changes. Note that, the changes can take anywhere from 5 minutes to 48 hours to fully propagate.
How to add TXT record at Dynadot
There are two approaches to add TXT record at Dynadot. The first is on the root @ of your domain, and the second is a subdomain.
1). Adding Dynadot TXT record on the root “@”.
- First, login into your Dynadot account.
- Click on the “My Domains” button then click on the “Manage Domain” button under ‘My Domains’ link.
- Now click on the box next to your domain name, and then click on the “Bulk Action” button above.
- On the ‘bulk’ button choose “DNS Settings” from the drop-down list.
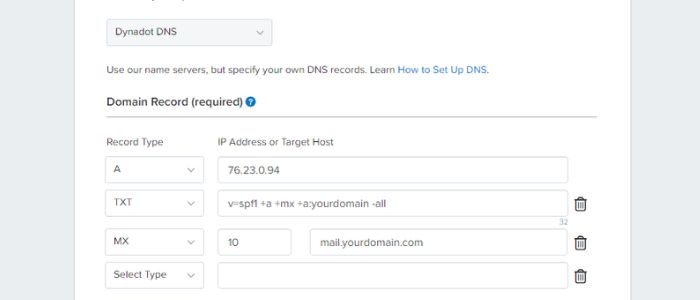
- Under the “Domain Record” section, select “TXT” as the record type from the “Record Type” drop-down.
- Now enter your TXT record on the “IP Address or Target Host” box.
- Once you are done press the “Save DNS” button to save your changes. Note that, the changes can take anywhere from 5 minutes to 48 hours to fully propagate.
2). Adding a Dynadot TXT record on a subdomain.
- Repeat the first four steps above.
- Under the “Subdomain Records” section, enter your subdomain name e.g. “_dmarc” on the “Subdomain” box, then select “TXT” as the record type from the “Record Type” drop-down, and then add your TXT record on the “IP Address or Target Host” box.
- Once you are done press the “Save DNS” button to save your changes. Note that, the changes can take anywhere from 5 minutes to 48 hours to fully propagate.
How to change Dynadot name servers
There are two ways of adding your name servers on Dynadot.
1). How to add name servers at Dynadot
- First, login into your Dynadot account.
- Click on the “My Domains” button then click on the “Manage Domain” button under My Domains link.
- Now click on the box next to your domain name, and then click on the “Bulk Action” button above.
- On the bulk button choose “DNS Settings” from the drop-down list.
- On the “DNS Setting” page, select “Name Servers”.
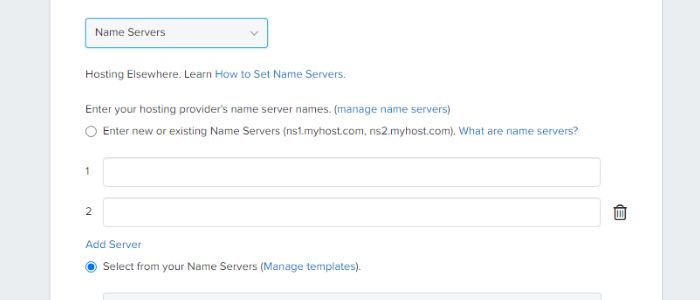
- Now enter your name servers.
- Once you are done press the “Save Name Servers” button to save your changes. Note that, the changes can take anywhere from 5 minutes to 48 hours to fully propagate.
2). How to register Name Servers at Dynadot; Also called Dynadot glue record.
Sometimes you are required to register your name servers to point to them. For example, if you are using Plesk and want to use Plesk to manage your DNS records, you will have to create these records and point your name server on your external domain registrar.
E.g. You may have to register your name servers together with the serve IP address, ns1.yourdomain.com 68.56.5.23, ns2.yourdomain.com 68.56.5.23. Afterward, you can now point to your name server as ns1.yourdomain.com and ns2.yourdomain.com on Dynadot.
- First, login into your Dynadot account.
- Click on the “My Domains” button then click on the “Name Servers” button under My Domains link.
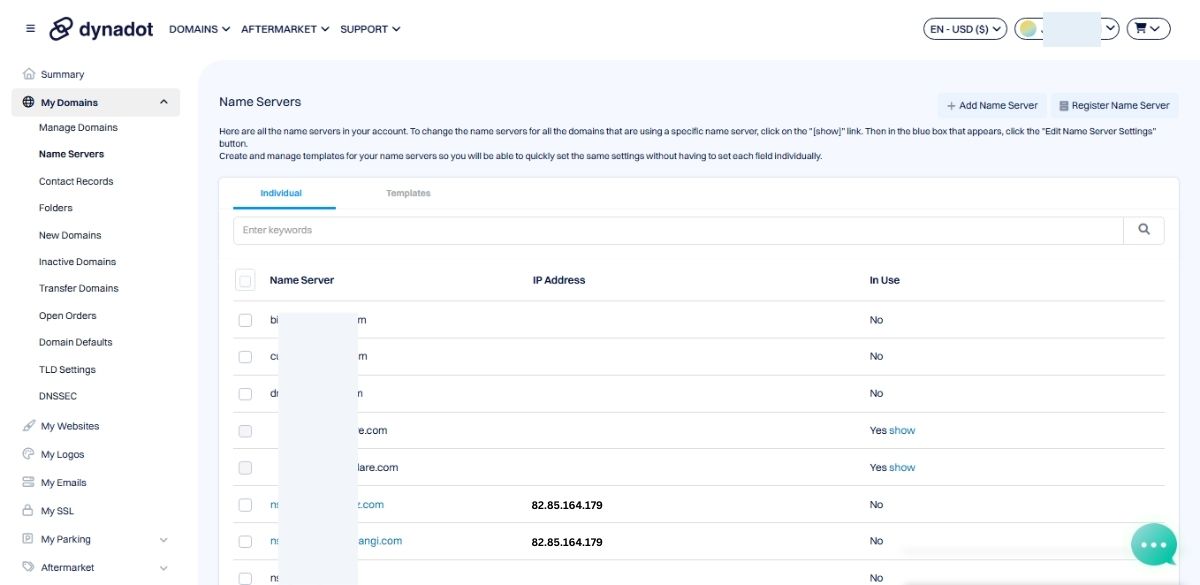
- Now click on the “Register Name Servers” button on your right next to the “Add Name Server” button.
- Now add your name server on the “Host Name” box and your server IP on the “IP Address” box.
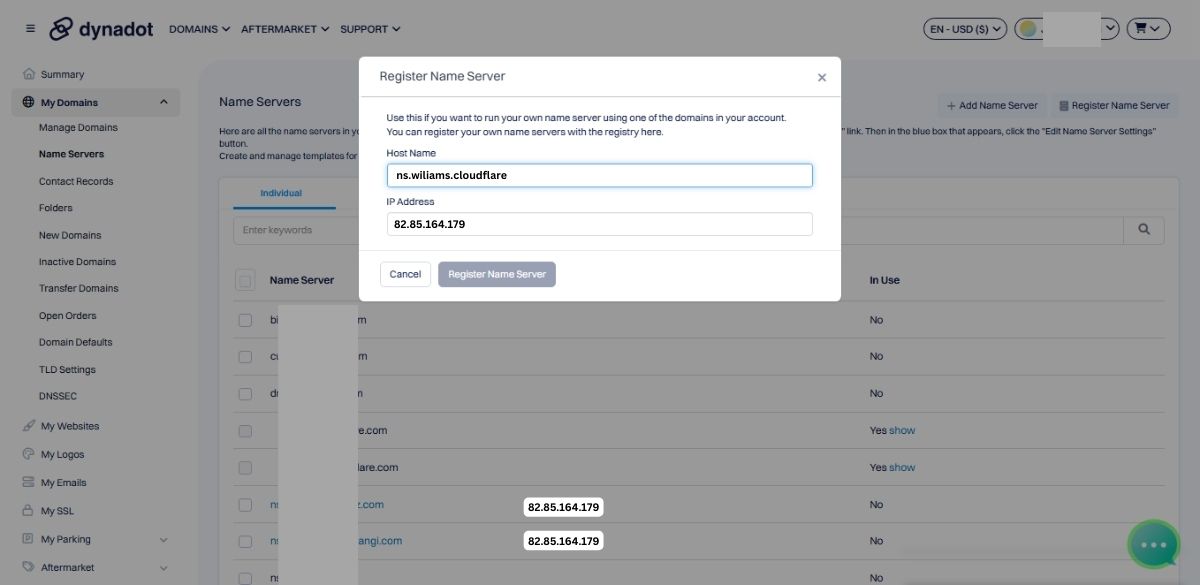
- Once you are done press the “Register Name Servers” button to save your changes. Note that, the changes can take anywhere from 5 minutes to 48 hours to fully propagate.
How to change email DNS record on Dynadot
If you are using your server to send and receive emails, then consider adding this record. To deliver email to another mail host add an MX record. Follow these simple steps.
- First, login into your Dynadot account.
- Click on the “My Domains” button then click on the “Manage Domain” button under My Domains link.
- Now click on the box next to your domain name, and then click on the “Bulk Action” button above.
- On the bulk button choose “Email Settings” from the drop-down list.
- On the drop-down button click MX record.

- Now add your MX record on the “Mail Host” box, and set the priority value on the “Distance” box.
- Once you are done press the “Save Email Settings” button to save your changes. Note that, the changes can take anywhere from 5 minutes to 48 hours to fully propagate.
Do you need web hosting for your site? Then, check out the best web hosting providers, best-managed WordPress hosting, and a detailed guide on how to start a website.
As an affiliate of Dynadot, I receive compensation for promoting their products on my website.
Disclosure: We may earn commission for purchases that are made by visitors on this site at no additional cost on your end. All information is for educational purposes and is not intended for financial advice. Read our affiliate disclosure.