How to Start a Christian Website and Make Money
The majority today spend most of their time online, socializing, reading, or shopping. If you are looking forward to making money online, then you have to find a way to tap into this online market. That is why it is necessary to have a website.
You can use this strategy to share your faith online and at the same time make a passive income. Then, if you are looking for a step-by-step guide on how to start a Christian website and make money, you are in the right place.

Starting a website is the same way as beginning a business. Therefore, you have to treat it as one or even a ministry. Unlike a physical business, a website doesn’t require any capital in place, however, you will need a few requirements to start a successful Christian website. We will discuss these requirements and the necessary steps to take to begin a website.
How to Make a Christian Website: A step-by-step guide
Step 1: Have a plan for starting a website.
Just like any other venture in life, a plan helps you stay focused as you have a clear goal. To succeed you have to treat your website as a business and allocate the necessary resources such as time and expertise.
If you are planning to begin a ministry website, have a clear plan of what content you intend to publish on your website. Your website is a brand and you want to be known for a specific area. You can check out websites like dreamyo.com and joshuamwangangi.com to draw some inspiration.
Step 2: Buy a domain name for your website
Now that you have a clear plan and strategy, you should consider registering a domain name for your website. A domain name is a URL/ link that you type on Google when you are searching for a specific site, e.g. joshwp.com.
Make sure to choose a domain name that relates to your niche- the type of content you will be publishing on your site.
I recommend Namecheap domain registrar as they have the best prices and a standard DNS manager. Dynadot is also another good domain registrar to consider, as they offer fixed prices, so you don’t need to worry about expensive renewal costs.
You can check out the full list of the best domain providers here to help you make the best decision based on your website’s needs. Before registering a domain name check if your web hosting company offers a free domain name.
It is wise to register a .com domain as it is what most people search for online. There are other domain extensions such as .net, .org for organizations, .io, .news, .health, and much more.
Every time you hear of an online business name- domain name, what comes to your mind? It’s a .com, as that is what most consumers are accustomed to, e.g. Most big companies have this domain extension, google.com, amazon.com, and much more.
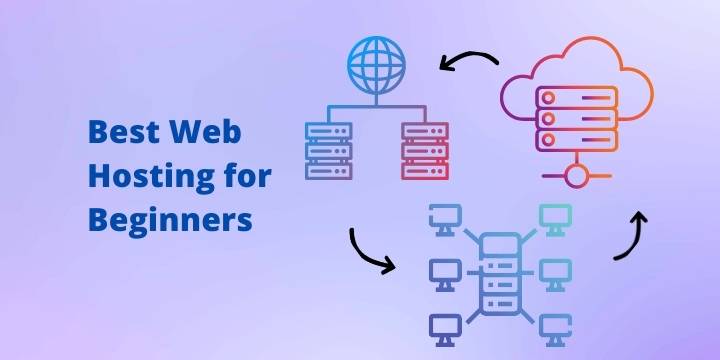
Step 3: Choose a good web hosting provider
Now that you have chosen a good domain name, it is time to get web hosting for your website. A web hosting provider is simply a company that holds your site’s files on its servers at a fee, as it will be very expensive to run your server locally.
Hosting your website on one of these platforms helps you to reduce the cost of running your online business, as you don’t need to worry about server maintenance updates and other technical issues.
For beginners, I recommend Cloudways Web Hosting. It offers an excellent blend of performance, ease of use, and scalability, making it a smart choice for launching your website with confidence.
Creating a Christian website starts with choosing the right hosting platform, and Cloudways offers an excellent solution for ministry-focused site owners. When launching your Christian website, Cloudways provides robust, user-friendly hosting that ensures your ministry’s message reaches its audience effectively. The platform’s performance optimization means your site loads quickly, keeping visitors engaged with your spiritual content.
Look for hosting that offers SSL security, as this builds trust with your audience and demonstrates your commitment to protecting their online experience.
Step 4: Choose the CMS content management system to use
Despite there being several CMS- content management systems- WordPress leads with a market share of 43% of all websites on the internet.
Other CMS include Magento, Wix, Joomla, Drupal, Squarespace, HubSpot, WooCommerce, BigCommerce, Shopify, Ghost, Textpattern, Blogger, TYPO3, Bitrix24, and PrestaShop.
WordPress is the best CMS and easiest to set up. It has great community support and there are thousands of plugins and ready-build themes to extend its functionality.
You don’t need any technical skills to run a website on WordPress, as there are themes with ready-to-use templates to start your site. A good example is the Kadence theme, Elementor theme, and much more.
With WordPress CMS, you can build anything including a simple website, an online forum, a marketplace like Fiverr, a membership site, an eCommerce store, and much more.
Step 5: Choose a suitable lightweight theme
A theme is simply a folder/ group of files that determine your website’s appearance and help you to design your site as you desire.
Depending on their functionalities, themes are classified as either lightweight- meaning they do not interfere with your site’s overall performance or heavy themes- meaning if they are not well configured they might add extra bloat to your website, hence affecting its performance.
A good example of a lightweight theme is GeneratePress, followed by Kadence, Astra, Blocksy, Neve, Zakra, Sydney, and OceanWP.
You should choose a theme that comes with most functionalities out of the box, as you do not want to end up adding many plugins for that purpose. This will make your site faster and neater.
I like Kadence as it meets that criterion. The theme comes with its theme builder and supports most basic functionality straight out of the box.
For example, the Kadence theme builder comes with an in-built table of contents, a full library of free starter templates, predesigned sections, and much more. Their premium add-on adds a ton of extra professional functionalities.
Step 6: Choose a page builder
Every theme comes with a theme builder, or you can choose a theme builder of your choice as long as it is compatible with the theme you are using. For example, GeneratePress comes with GeneratePress page builder, Kadence theme with Kadence page builder, and Elementor Hello theme comes with Elementor page builder.
Other popular page builders include Beaver, Nimble Builder, WPBakery, Visual Composer, Themify Builder, Divi Builder, SiteOrigin, brizy, WP Page Builder, Oxygen, Genesis Pro, Gutenberg, and many more.
Step 7: Install the necessary plugins
Plugins are like mobile apps within the website. They are used to extend the theme’s functionalities, such as adding a table of contents, adding social share icons, backup purposes, security enhancement, image compression, and optimization, caching, payment integration, WooCommerce extensions, and much more.
Every website has its unique needs; hence only choose the plugins you need. Most plugins add extra bloat interfering with your site’s overall performance. You want to be wise about which plugins to choose. If possible, go for a theme that gives you most of these functionalities out of the box.
If you are considering starting an online course website, I recommend using LearnDash as it comes with premade templates and additional functionalities for a course website.
Step 8: WordPress Theme Customization: How to Fully Edit Your Entire Website Using AI
Now that you have everything you need and have a clue of what to do, it is time for the actual work. Login to your WordPress website, and install the right theme and page builder. As I said earlier most themes come with a few ready-made templates to help you to set up a professional website with ease.
Transforming your Christian website’s design doesn’t require advanced coding skills. AI-powered tools now make website customization accessible for ministry leaders and content creators.
Choose from the template library a design that suits you and click apply. Now you can change the template’s content to fit what you need. You can check out the step-by-step guide on how to create a WordPress website using the Kadence theme and Kadence page builder.
You can also choose different templates for different pages of your website and edit the content to suit your site’s needs. Create a menu, header, and footer section.
Step 9: How to Write and Post Your First Article on WordPress
Now that you have created a professional-looking website, it is time to add content. If you are intending to use your website for blogging, consider adding a few articles to start with. At this stage, you can also add any other page content.
Sharing your Christian message through WordPress becomes seamless with the right approach. Focus on creating authentic, engaging content that resonates with your spiritual community.
Make sure you have added content to your home page, have an about us page, a service page, a contact page, a privacy policy, and any other page you deem fit for your site. If it is a church or charity website, you can also add a donation page.
Step 10: Publish your website
The final step of creating your website is launching it officially. You can now confidently publish your website, meaning it will be live and visible online. You can now access your site using your domain name, and share the link with friends. Consider creating and publishing content for your website regularly to increase its visibility on search engines.
You can now read my step-by-step guide on what to do after publishing your website here.
Step 11: Create a business email address that matches your domain name
You will surely want to send newsletters to your audience on various updates. A good business address will enable you to achieve this objective.
Trust me, you don’t want to use your personal email address for this, as it can limit you and even be penalized and sent to your user’s spam folder.
The difference between a business email address and a personal email is that, unlike your normal Gmail email, a business email uses your own domain and not Gmail’s subdomain. i.e. info@joshwp.com, contact@joshwp.com, sale@joshwp.com, support@joshwp.com, unlike the Gmail email which ends with @gmail.com. You can put whatever you desire before @yourdomain.com.
Adding a Domain Name to Cloudflare CDN
Your Christian website deserves maximum visibility and protection. Cloudflare’s Content Delivery Network (CDN) ensures your ministry’s online presence remains fast, secure, and accessible worldwide. By routing your domain through Cloudflare, you’ll enhance website performance and protect against potential online threats.
Implementation steps:
- Register your domain name (preferably something ministry-related)
- Create a Cloudflare account
- Add your Christian website’s domain
- Verify domain ownership
- Update nameservers
How To Add Cloudflare Nameservers On Namecheap
Connecting your Christian website’s domain requires precise nameserver configuration. Namecheap makes this process straightforward, ensuring your ministry’s online platform remains stable and secure.
Detailed configuration process:
- Log into Namecheap account
- Navigate to domain management
- Locate nameserver settings
- Replace default nameservers with Cloudflare’s provided servers
- Save changes and wait for propagation
On-Page SEO for Christian Websites
Effective SEO ensures your ministry’s message reaches those seeking spiritual guidance online. Implement strategic optimization techniques to improve your website’s visibility.
SEO best practices:
- Use descriptive, keyword-rich titles
- Write meta descriptions that capture your spiritual message
- Create internal links between related content
- Optimize images with meaningful alt text
- Ensure mobile responsiveness
4 Free Keyword Research Methods: Easiest Method
Discover topics your audience searches for without spending money on expensive tools.
Links used in this video:
How to Write Articles Using AI: Enhance Your Content Strategy with SeoWriting
In the present day, using artificial intelligence for article writing is revolutionizing content creation. With AI-powered platforms like seowriting.ai, you can generate high-quality, SEO-friendly content that drives organic traffic and boosts reader engagement. Here’s an SEO-optimized guide to harnessing AI for writing articles:
Embrace AI for Efficient Content Creation
Leverage the power of AI to streamline your content process. seowriting.ai allows you to:
- Generate Keyword-Rich Content: Automatically incorporate relevant keywords to improve search engine rankings.
- Optimize Readability: Structure your articles with clear headings, subheadings, and bullet points for better user experience.
- Craft Engaging Headlines: Create captivating titles that increase click-through rates.
- Produce Meta Descriptions: Develop concise meta tags that accurately reflect your article content.
How SeoWriting Boosts Your SEO Efforts
SeoWriting is designed with SEO in mind, offering features that help you stay ahead of the competition:
- Real-Time Analytics: Monitor the performance of your articles to refine your SEO strategy continuously.
- Keyword Research: Discover high-performing keywords tailored to your niche.
- Competitor Analysis: Gain insights into trending topics and strategies used by competitors.
- Content Optimization: Ensure proper keyword density, internal linking, and engaging formatting.
Website Monetization with Adsterra Ads
For Christian websites seeking alternative revenue streams, especially after Google AdSense rejection, Adsterra Ads offers a powerful alternative to monetize your online content. Designed to work with websites that fall outside AdSense’s strict approval criteria, Adsterra Ads provides a flexible, user-friendly solution that enables you to earn revenue through diverse, high-converting ad formats.
Why Choose Adsterra Ads?
- Fast Approval & Easy Setup: Get started quickly—even if your site doesn’t meet Google AdSense’s guidelines. With a streamlined sign-up process, you can add your website URL and start monetizing within minutes.
- Diverse Ad Formats: Choose from popunders, native banners, social bar ads, and display banners that are optimized to fit your website’s design and boost user engagement.
- High Conversion Rates: Adsterra’s advanced targeting and dynamic ad placement algorithms help maximize click-through rates, ensuring you earn more from every impression.
- Flexible Monetization Options: Whether your site caters to niche audiences or handles sensitive content, Adsterra Ads adapts to your unique needs, providing revenue even for websites that Google might reject.
How to Monetize Your Website with Adsterra Ads
- Monitor & Optimize: Use Adsterra’s dashboard analytics to track ad performance and fine-tune placements for maximum revenue.
- Sign Up as a Publisher: Register on Adsterr’s platform, verify your email, and log in to your dashboard.
- Add Your Website: Input your URL, select your website category, and complete the necessary details to initiate the approval process.
- Select Ad Units: Pick from a range of ad formats—like popunders or native banners—to find the best fit for your site’s layout and audience.
- Generate & Place Ad Code: Once your site is approved, copy the unique ad code provided and embed it into your website’s HTML or CMS widget.
Learn How to Convert YouTube Videos to Blogs Using AI
Unlock the potential of your video content by turning your YouTube videos into high-quality, SEO-optimized blog posts with the video to blog tool. This innovative AI-powered tool streamlines your content repurposing process, helping you drive organic traffic, boost search rankings, and engage a broader audience.
How the video to blog tool Works
- SEO Optimization: Generate keyword-rich content complete with meta titles, descriptions, internal/external links, and properly structured headers to rank higher on search engines.
- Instant Conversion: Simply paste your YouTube video URL, and vidoetoblog.ai extracts the video transcript to create a draft blog post within seconds.
- AI-Powered Content Creation: The tool leverages advanced AI to reframe the transcript into well-structured, professional articles that maintain your unique tone and style.
- Visual Enhancements: Automatically add relevant screenshots, stock images, and AI-generated visuals to enrich your blog posts and enhance reader engagement.
How to Make Free Infographics Using Napkin AI
Create visually engaging materials that communicate your Christian message effectively.
Infographic creation tips:
- Choose meaningful, scripture-inspired topics
- Use clean, professional design
- Include biblical references
- Make information easily digestible
How to Make an Online Store Website Using WordPress
Develop an e-commerce platform for ministry resources, books, or supportive merchandise. The video below will teach you everything you need to know about setting up an Online Store.
Store setup guidance:
- Select WooCommerce plugin
- Choose ministry-friendly themes
- Set up secure payment gateways
- Create compelling product descriptions
- Implement user-friendly navigation
Which Type of Website is Profitable?
Any website can be profitable; you only need a good strategy to outdo others in your niche. You can achieve this by doing original research and creating quality and detailed content that adds value to the readers. You don’t just want to create another copy of existing content. However, you can look at existing content to spot a gap and then do original research on the topic and produce a better-detailed copy on the same subject.
Can I Start a Christian Website for Free? How Oracle Cloud Free Tier Makes It Possible
Yes, you can absolutely start a Christian website for free, and one of the best ways to do this is by leveraging the Oracle Cloud Free Tier. With its robust set of always-free services, Oracle Cloud provides you with the tools you need to launch and maintain a professional, secure, and scalable website without incurring any costs.
The downside of this method is that it requires technical expertise, which might not be ideal for beginners.
Why Oracle Cloud Free Tier Is Ideal for Your Christian Website
- Always-Free Resources: Oracle Cloud Free Tier offers essential services like compute instances, databases, storage, and networking—all at no cost. This means you can host your Christian website without worrying about monthly fees.
- High-Performance & Scalability: Even as your website grows with more content, community features, and multimedia, Oracle Cloud’s scalable infrastructure ensures that your site runs smoothly.
- Robust Security: With built-in security features and regular updates, your website and its visitors’ data remain safe—a key priority for any Christian community platform.
- User-Friendly Setup: Oracle Cloud provides an intuitive dashboard and comprehensive documentation, making it easy even for beginners to set up and manage their website.
How to Get Started
- Sign Up for Oracle Cloud Free Tier: Create an Oracle Cloud account and take advantage of their always-free services.
- Set Up Your Website: Use the free compute instance to host your website, integrate a content management system like WordPress, and customize it to reflect your Christian mission and values.
- Expand as You Grow: As your website gains traction, Oracle Cloud offers upgrade options so you can scale your resources to meet increased traffic and content needs.
By choosing Oracle Cloud Free Tier, you not only start your Christian website without any financial burden but also ensure a reliable and secure online presence that can grow with your community. Start your journey today and share your faith with the world—all for free.
Disclosure: We may earn commission for purchases that are made by visitors on this site at no additional cost on your end. All information is for educational purposes and is not intended for financial advice. Read our affiliate disclosure.