How to Install CloudPanel on Contabo VPS
Setting up CloudPanel on a Contabo VPS is a straightforward process that allows you to manage your web applications efficiently. In this guide, we’ll walk you through each step, from selecting your VPS plan to installing CloudPanel and setting up WordPress. Let’s dive in and explore how to install CloudPanel on Contabo, ensuring you have all the necessary details to get started.
Selecting Your Contabo VPS Plan
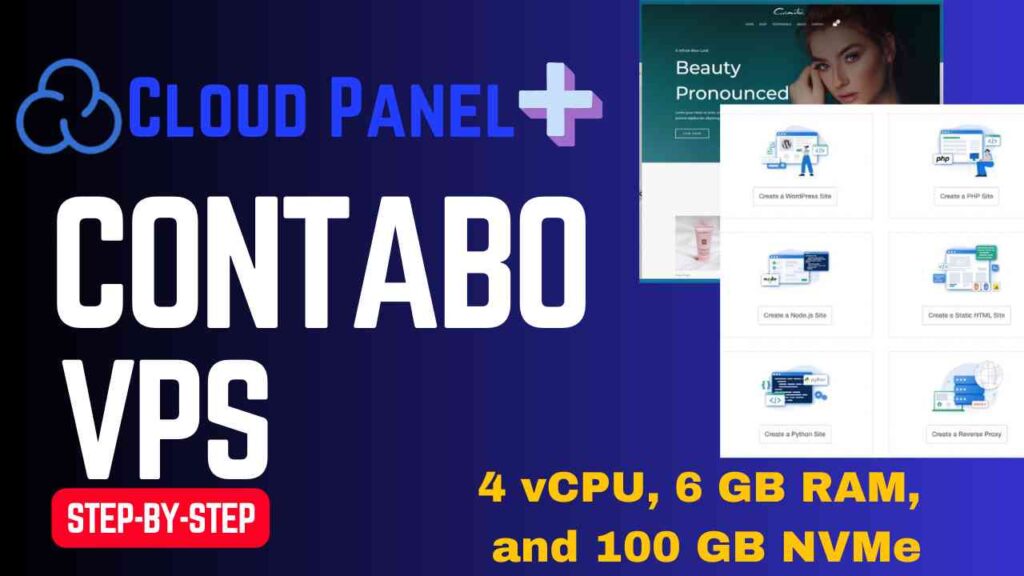
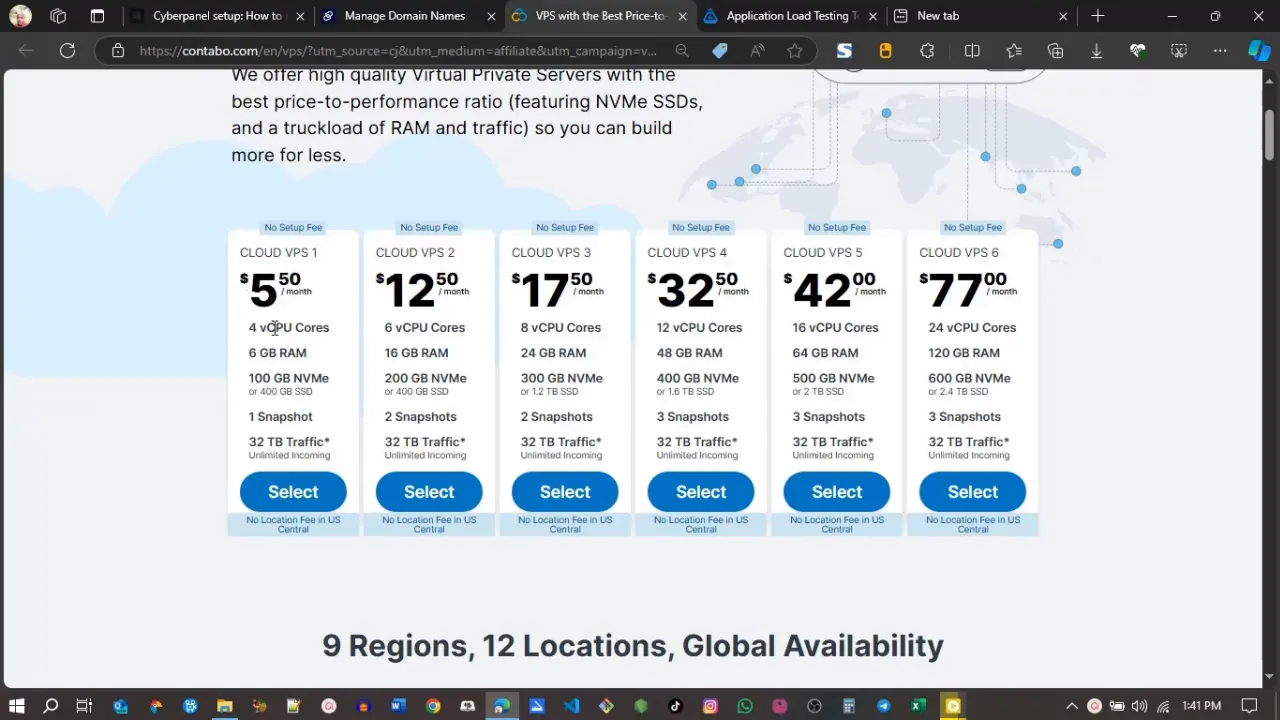
The first step is to choose the right VPS plan that fits your needs. Contabo offers a variety of plans, and for this tutorial, we’ll be selecting the $5 plan, which includes:
- 4 Virtual CPUs
- 6 GB RAM
- 100 GB NVMe storage
- 400 GB SSD storage
- 1 Snapshot
- 32 TB of traffic
Choosing this plan ensures that you have ample resources for running CloudPanel and hosting your applications.
Choosing a Region
When setting up your VPS, you need to select a region. Keep in mind that each region may have an additional fee. For this setup, I’ll choose the European Union region. Additionally, using Cloudflare CDN can help save costs, making it a smart choice for website management.
Related: Verpex Web Hosting Review
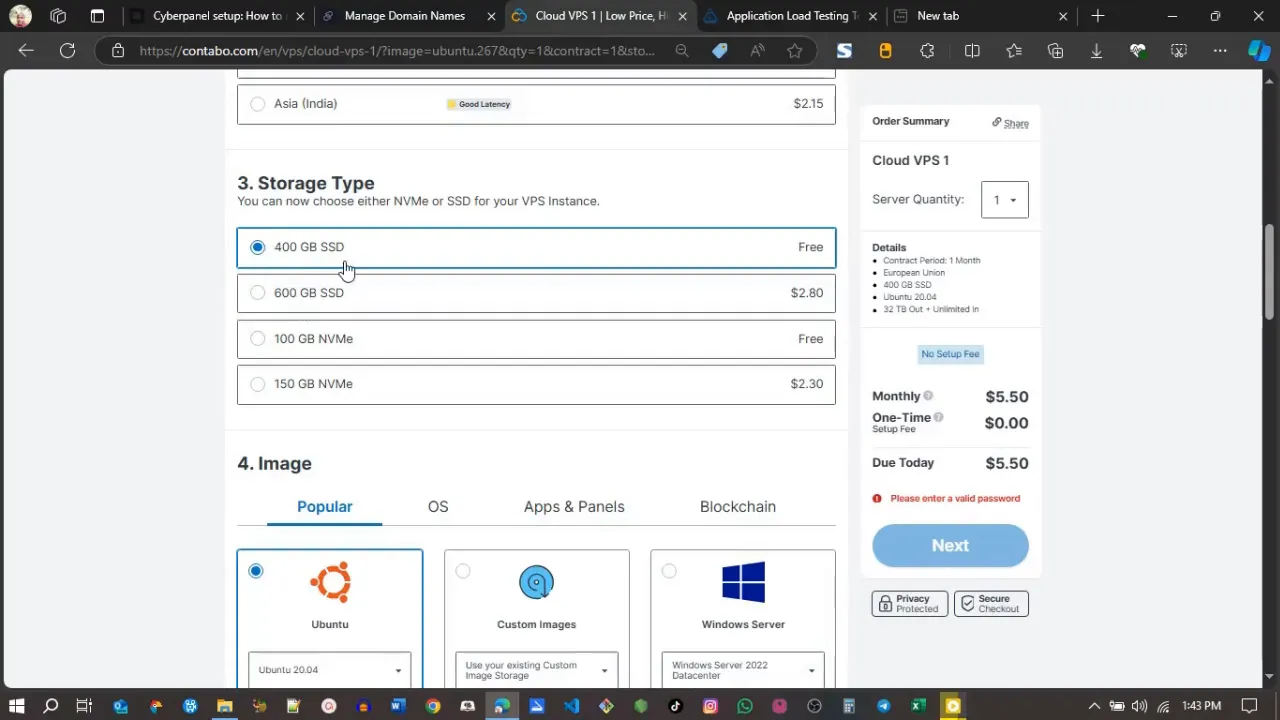
Storage Type and Operating System
Next, you’ll choose the storage type. I recommend opting for the 100 GB NVMe storage instead of the SSD storage. Then, select the operating system. In this case, I’ll choose Ubuntu 20.04.
Creating Your Account and Payment
You will also need to create a password for your root account. It’s crucial to save this password in a secure location, as you will need it later for logging in. After filling in your personal information and choosing a payment method, such as PayPal or credit card, proceed to make the payment.
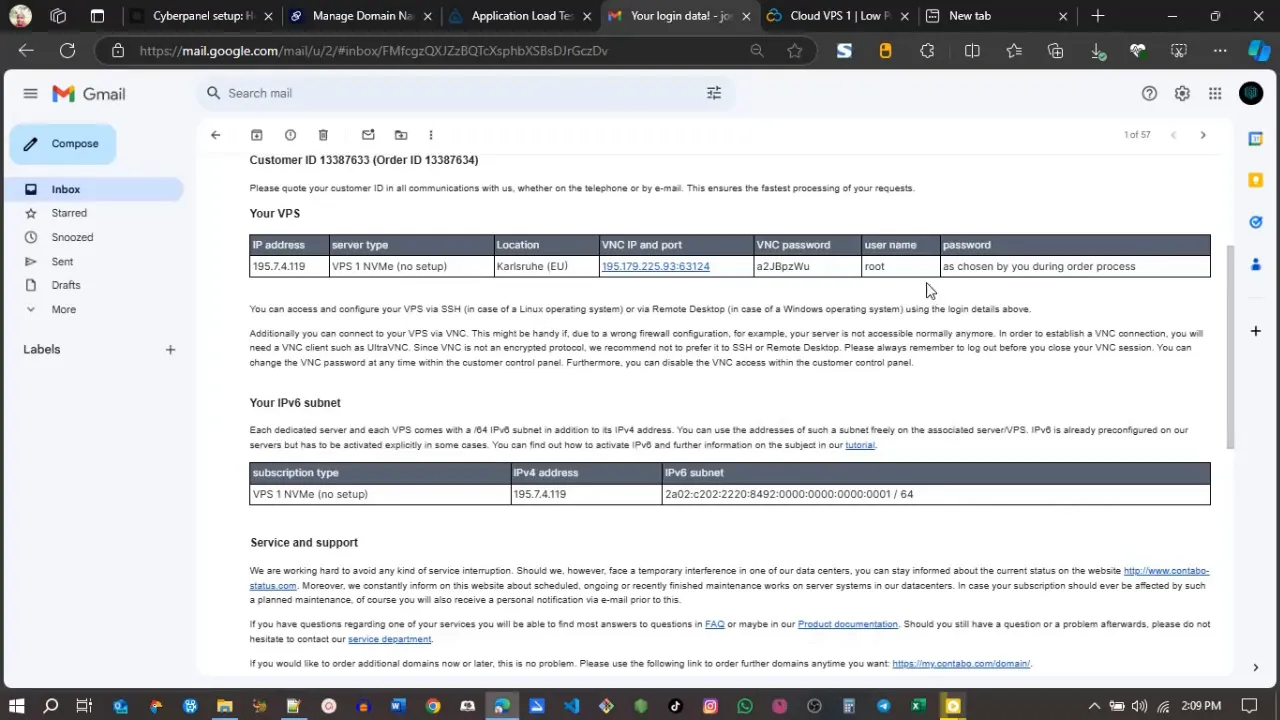
Connecting Your Domain to the VPS
Once your payment is processed, you will receive an email with your VPS details, including the IP address. Use this IP address to connect it to your DNS manager. For example, if you are using a domain from Dynadot, you’ll add an A record pointing to your VPS IP address.
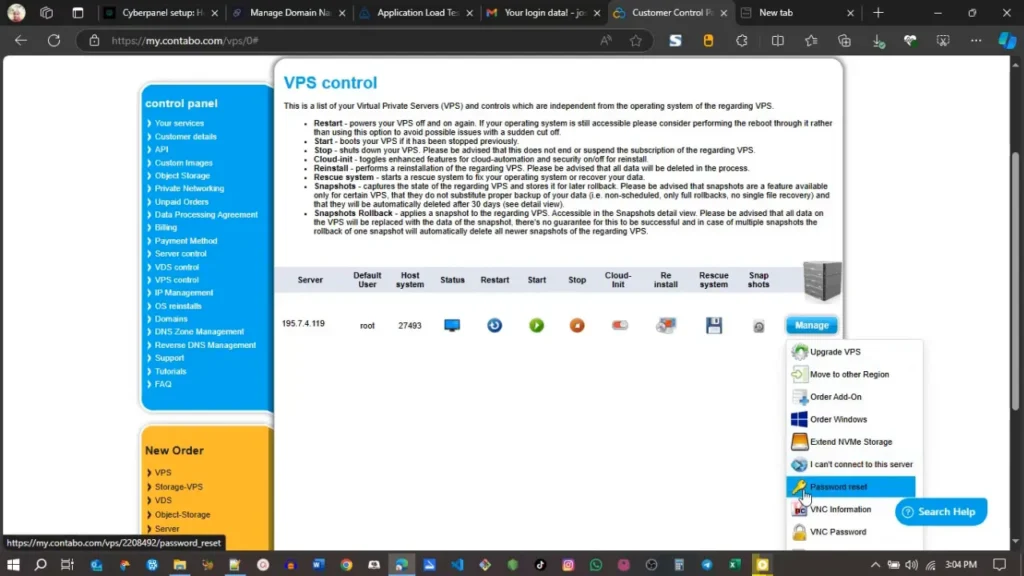
Accessing Your VPS
After setting up your DNS records, you can log into your VPS using an SSH client like PuTTY. Enter your VPS IP address and log in as the root user using the password you created earlier.
Updating the System
Before installing CloudPanel, it’s essential to update your system. Run the following command:
sudo apt update && sudo apt upgrade -yThis command ensures that all packages are up to date, which is crucial for security and stability.
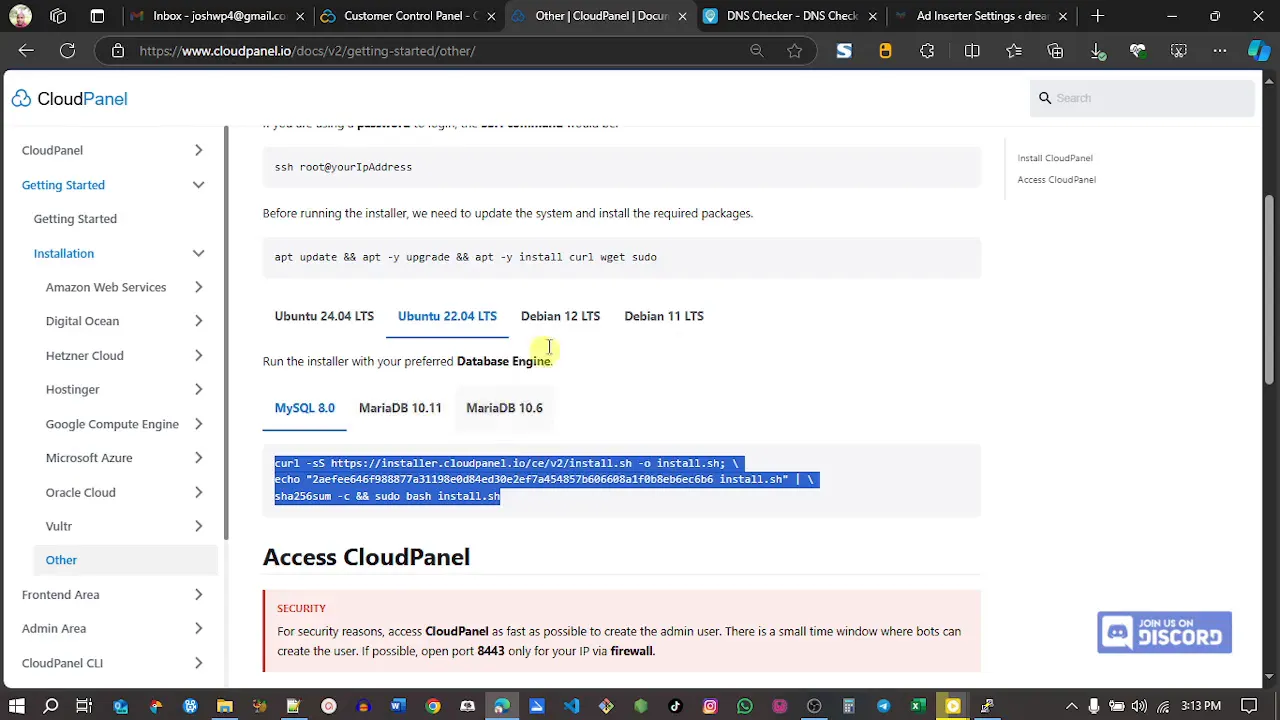
Installing CloudPanel
Now, let’s install CloudPanel. You will need to run the installation script. Here’s the command to execute:
bash <(curl -sSL https://get.cloudpanel.io/installer.sh)Allow the installation to complete, which may take several minutes. Once finished, you will receive a link to access the CloudPanel interface.
Rebooting the System
After the installation is complete, reboot your VPS to ensure all changes take effect. You can do this by typing:
rebootWait for about 5 to 7 minutes for the system to reboot properly.
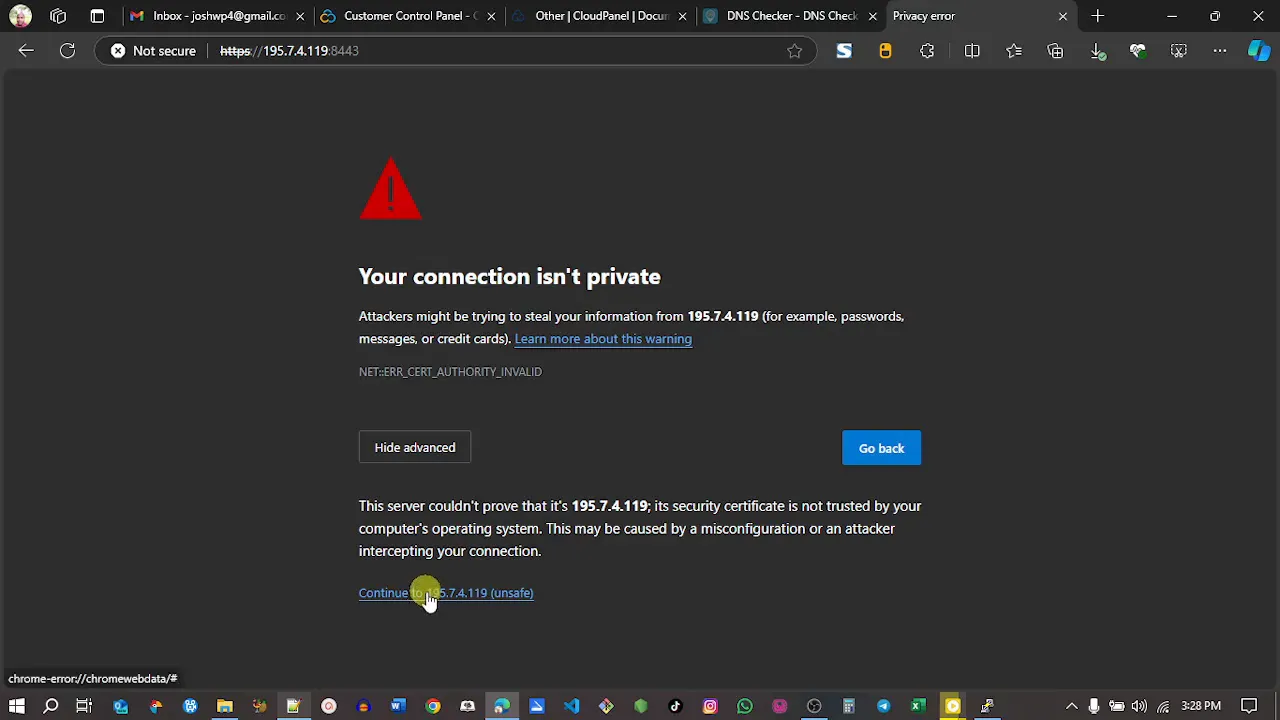
Accessing CloudPanel
To access CloudPanel, use your VPS IP address followed by the port number specified during installation. Enter your details to log in, and create a strong password for your CloudPanel account.
Configuring Your CloudPanel
Once logged in, you may want to set a custom domain for easier access. Navigate to the admin area, then under settings, update the address to your desired subdomain. Make sure to install an SSL certificate for security.
Related: Setting Up CyberPanel on Contabo
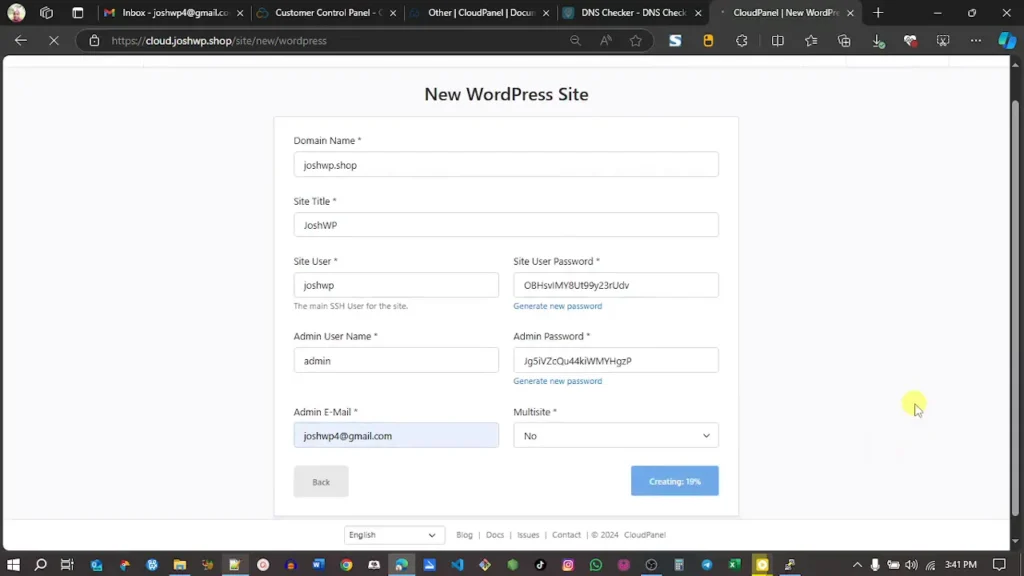
Installing WordPress
Now that CloudPanel is set up, let’s install WordPress. In the CloudPanel dashboard, click on “Add a Site.” Choose the WordPress option and fill in the necessary details, such as your domain name and site title. CloudPanel will automatically generate passwords for you, which you should save securely.
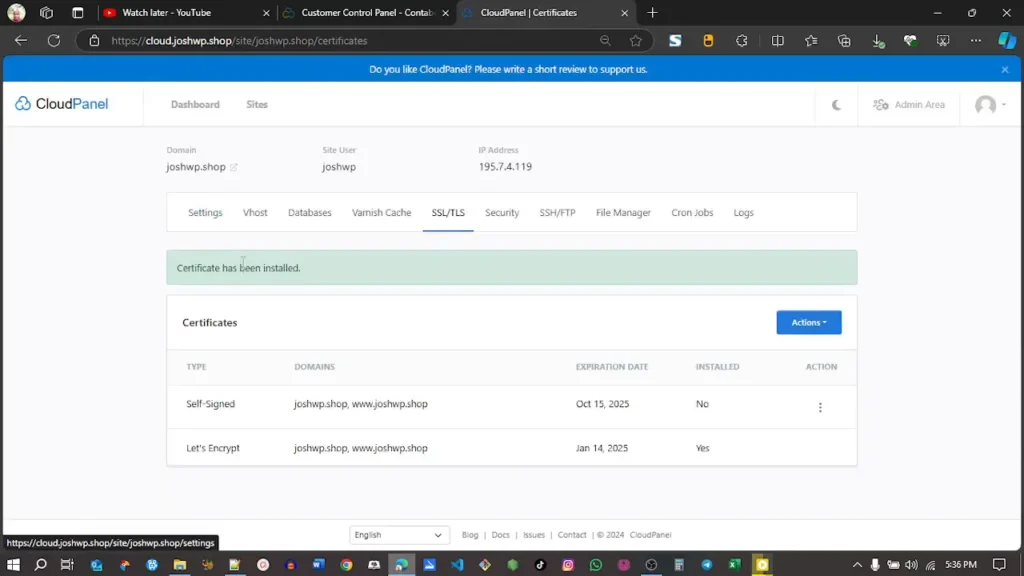
Issuing an SSL Certificate for Your Site
To secure your WordPress site, you’ll need to issue an SSL certificate. Under the SSL and TLS settings, choose to add a new Let’s Encrypt certificate. Make sure your DNS is properly propagated before doing this.
Related: Hestia Panel Installation on Contabo VPS
Finalizing Your WordPress Setup
Once the SSL certificate is installed successfully, you can access your WordPress site. Use the credentials you saved earlier to log in to the WordPress admin panel. From here, you can customize your site, install themes, and start creating content.
Conclusion: How to Install CloudPanel on Contabo
Congratulations! You have successfully installed CloudPanel on your Contabo VPS and set up WordPress. This setup not only provides a robust hosting environment but also allows for easy management of multiple sites. Enjoy exploring the features of CloudPanel and customizing your new WordPress site!
Disclosure: We may earn commission for purchases that are made by visitors on this site at no additional cost on your end. All information is for educational purposes and is not intended for financial advice. Read our affiliate disclosure.