How to Set Up WooCommerce on Cloudways
Setting up WooCommerce on Cloudways is a great way to launch your e-commerce store with optimal performance. Here is a step-by-step guide on how to set up WooCommerce on Cloudways.
Step 1: Sign Up for Cloudways
- Go to the Cloudways website and sign up for an account.
- Once logged in, you’ll be in the Cloudways dashboard.
Use this link to sign up for a Cloudways account and get a 3-day free trial. You will be directed to the Cloudways signup page where you will need to fill in all the necessary details. Then click on the “start free” button.

On the next screen fill in your details (that include: your name, email address, and a strong password) to get started for free. Select an average monthly hosting spending on the drop-down menu, and check the terms of services box.
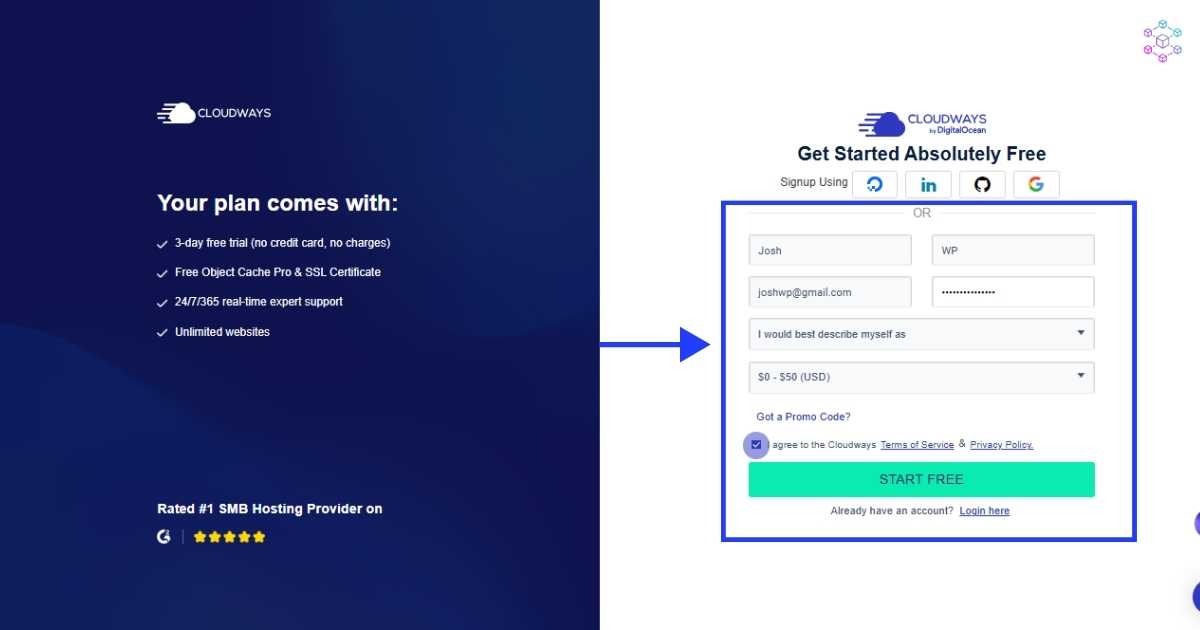
You will be prompted to verify your account by providing additional details. Make sure to fill in the accurate information and then, click on the submit button.
Use the promo code JOSHWP.
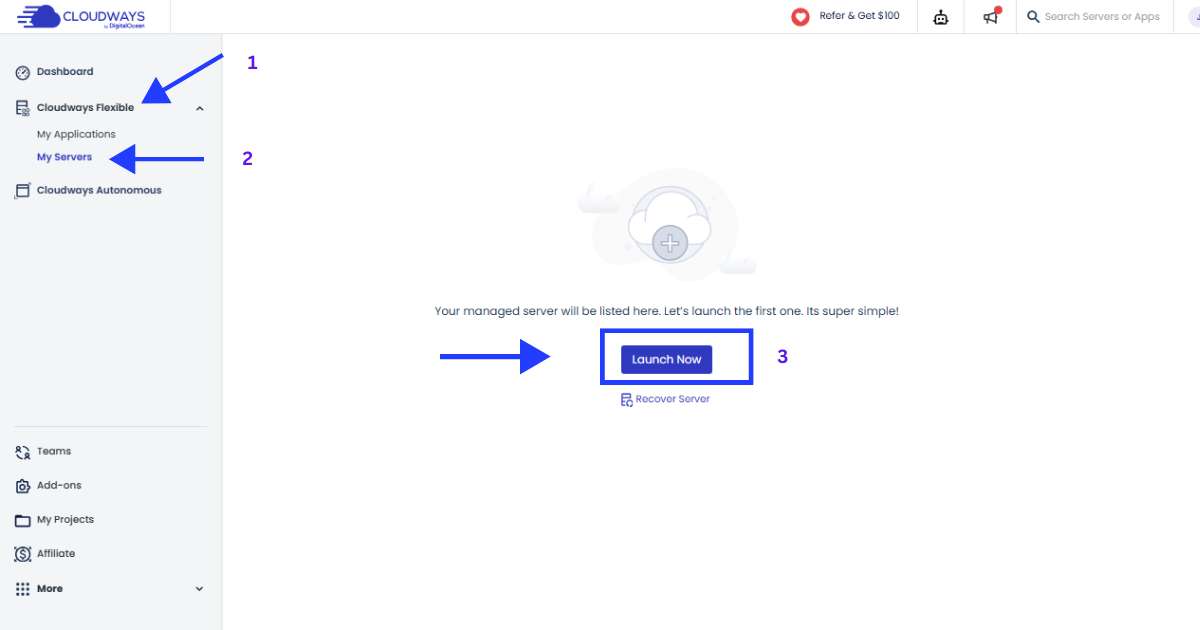
Step 2: Launch a New Server
Now you can go ahead and launch your server. On the left menu, click on Cloudways Flexible > My Serve to add a new server. Now click on the “Launch” button
It’s time to choose an application of your choice, for most people it will be WordPress. You can give it a name of your choice for all three options, which include ‘app name’, ‘server name’, and ‘project name’. Now select your server provider.
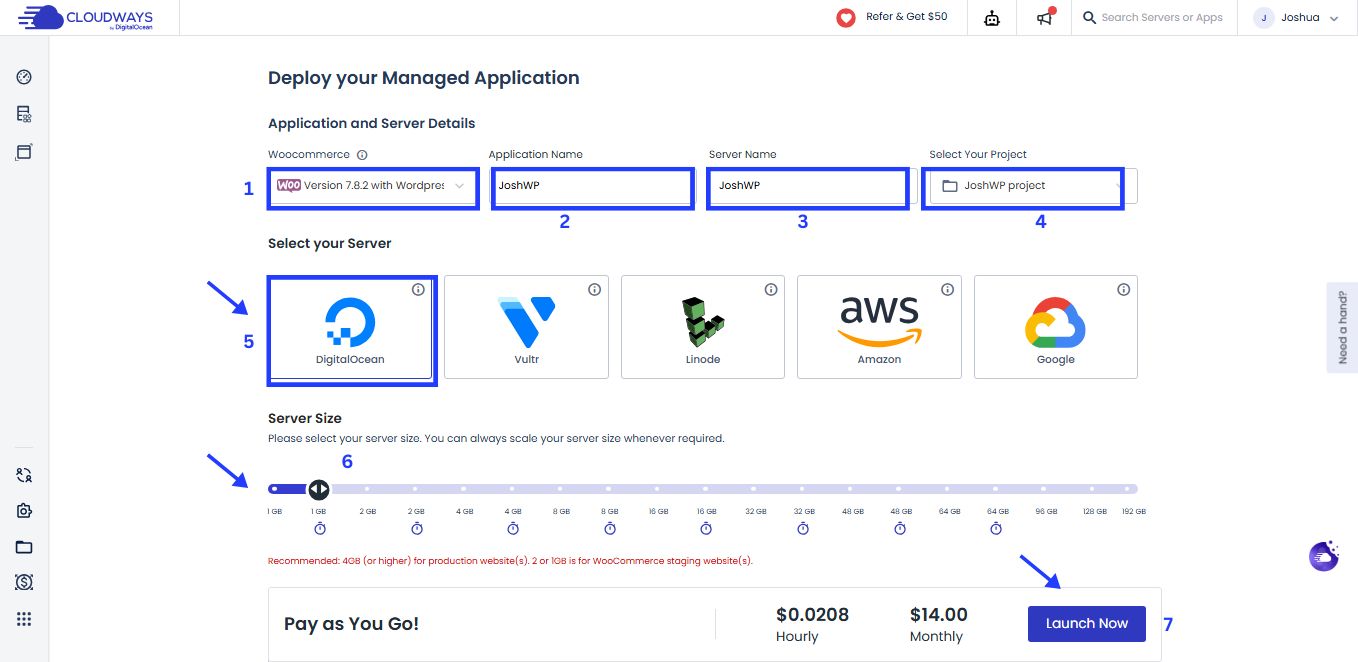
In the next step, select Digital Ocean as your server provider as shown in the image above.
Step 3: Add a Domain to Cloudways
Cloudways doesn’t offer domain registration services, so you will need to buy on a trusted platform. Check the list of cheap and reliable domain registrars here. To point your domain name to Cloudways;
- Copy your server IP address in the “Access Details section”
- Next, go to your domain register management dashboard and add new DNS records as shown below.
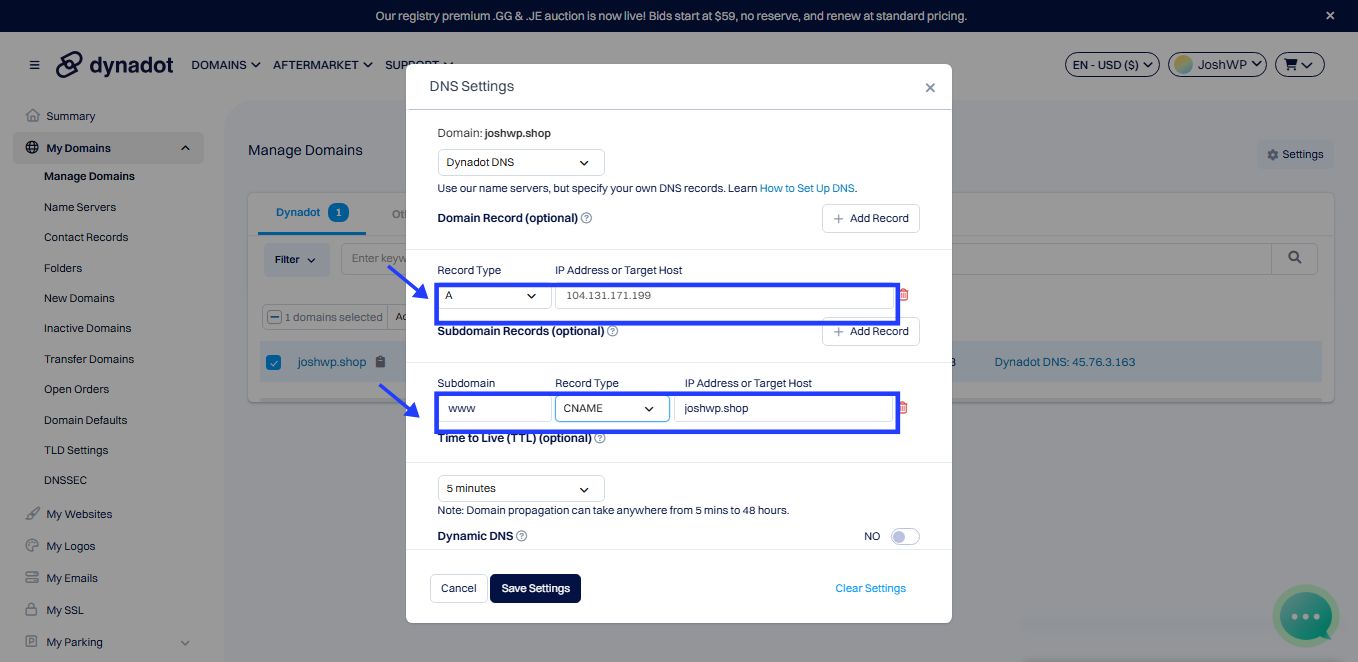
- The important records to be added include A records and CNAME records as shown above.
- Once you have added the records, give it time to propagate.
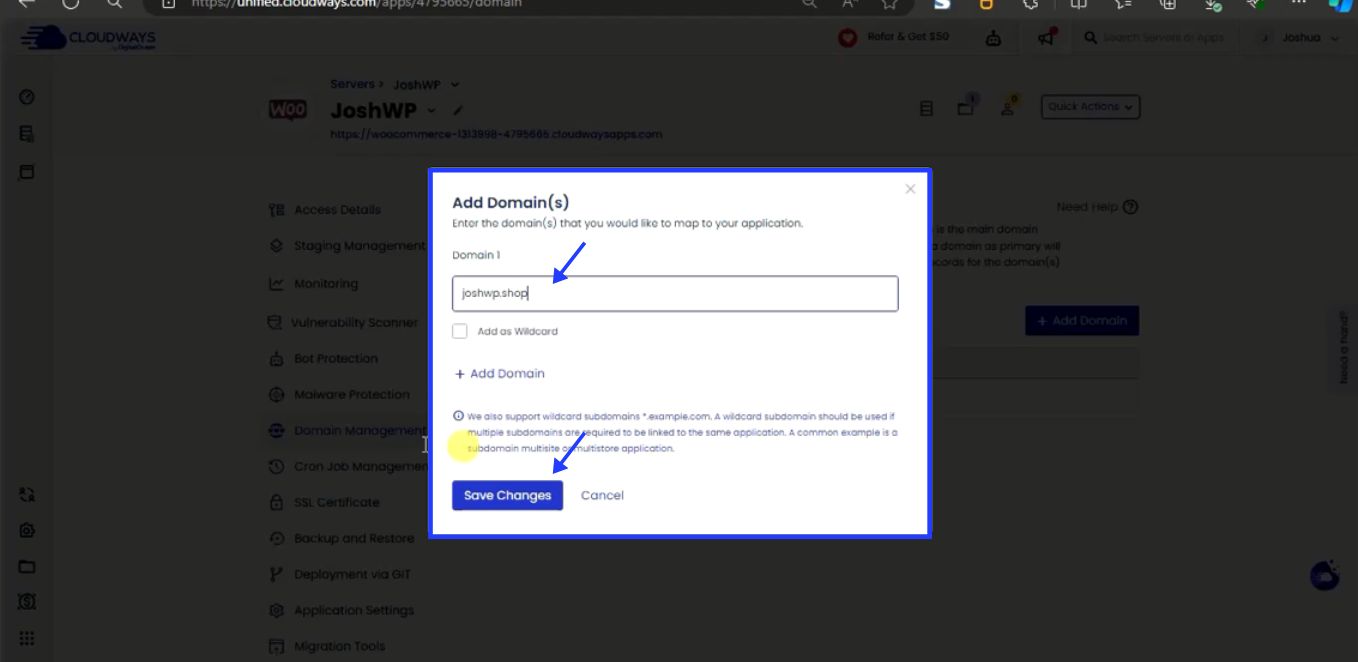
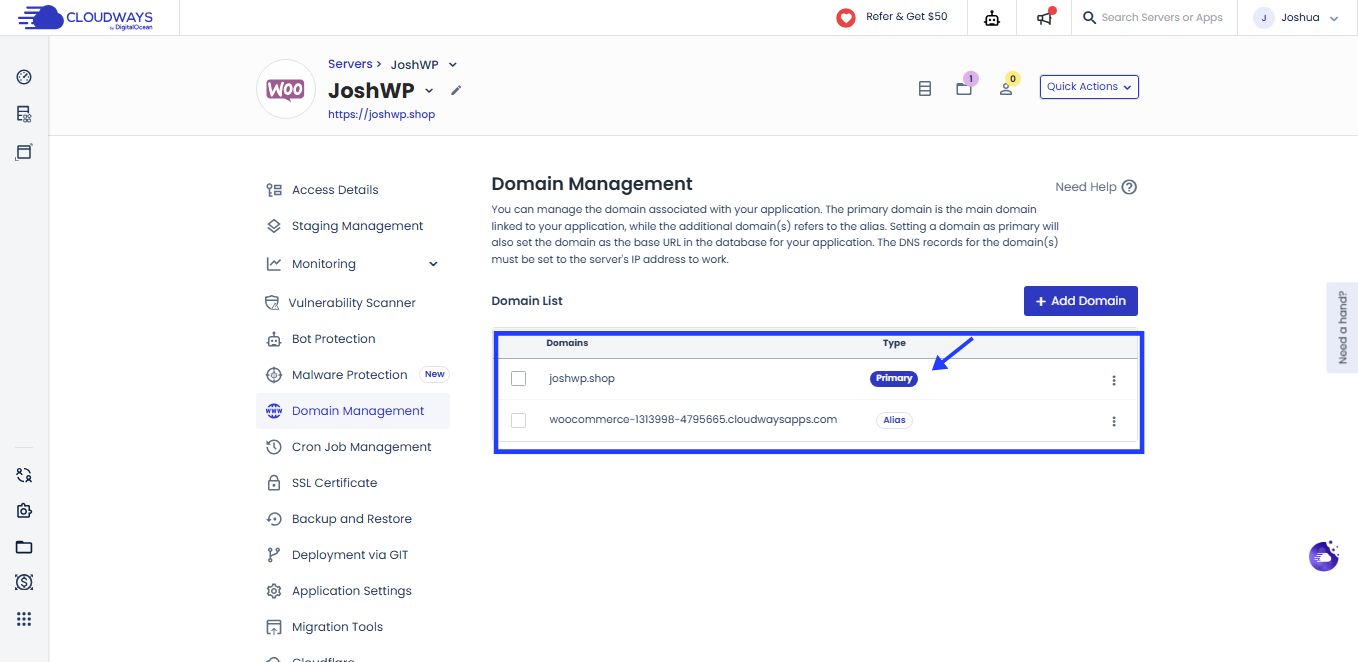
Now you can add your domain name to Cloudways as follows:
- Under the “Application Section” section, select the “Domain Management” option.
- Click on the “Add Domain” button to add your domain name.

- A popup will appear where you will add your domain name in the format (yourdomain.com) without the https or any other characters. Once done, click on the ‘Add domain’ button.
- Change it to the primary domain by clicking on the 3 dots on the right of your screen > then click on the ‘make primary’ option.
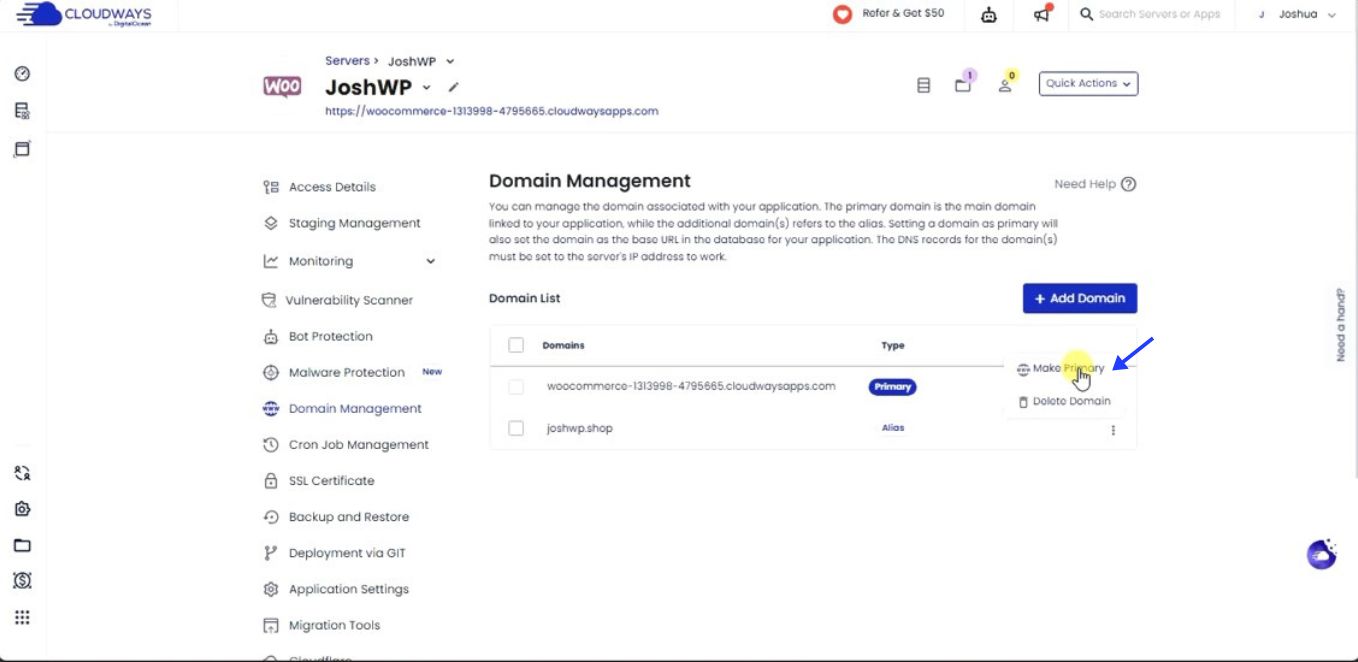
- A popup will appear asking you to confirm your action, click on ‘change’ to proceed.
Related: Shopify Alternatives for Your E-Commerce Store
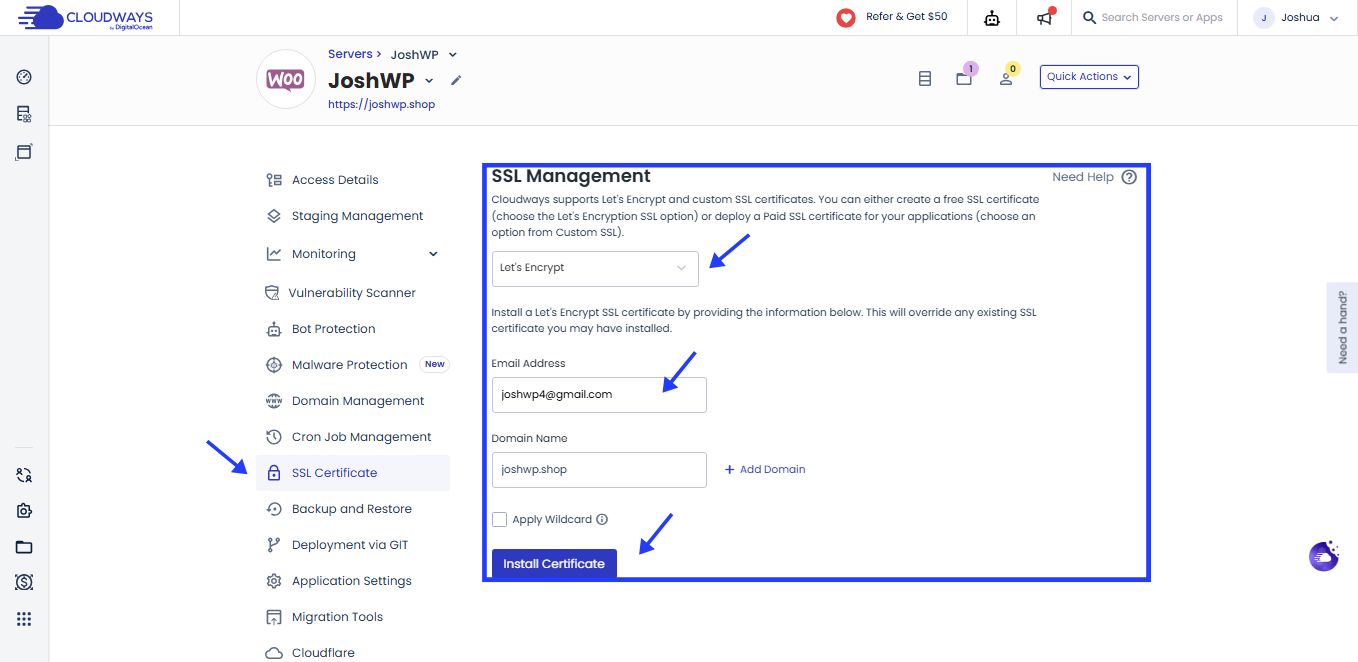
Step 4: Issue an SSL Certificate for Enhanced Website Security
Once you have added your domain name, consider adding an SSL certificate to your site.
- Under the “Applications” section, select the “SSL Certificate” option.
- Select Let’s Encrypt certificate
- Now, add your email address and domain name
- Then click on the “install certificate” button
Now if you go back to the “Access details” section, you will see that your site’s information is updated, from a stagging domain name to your domain.
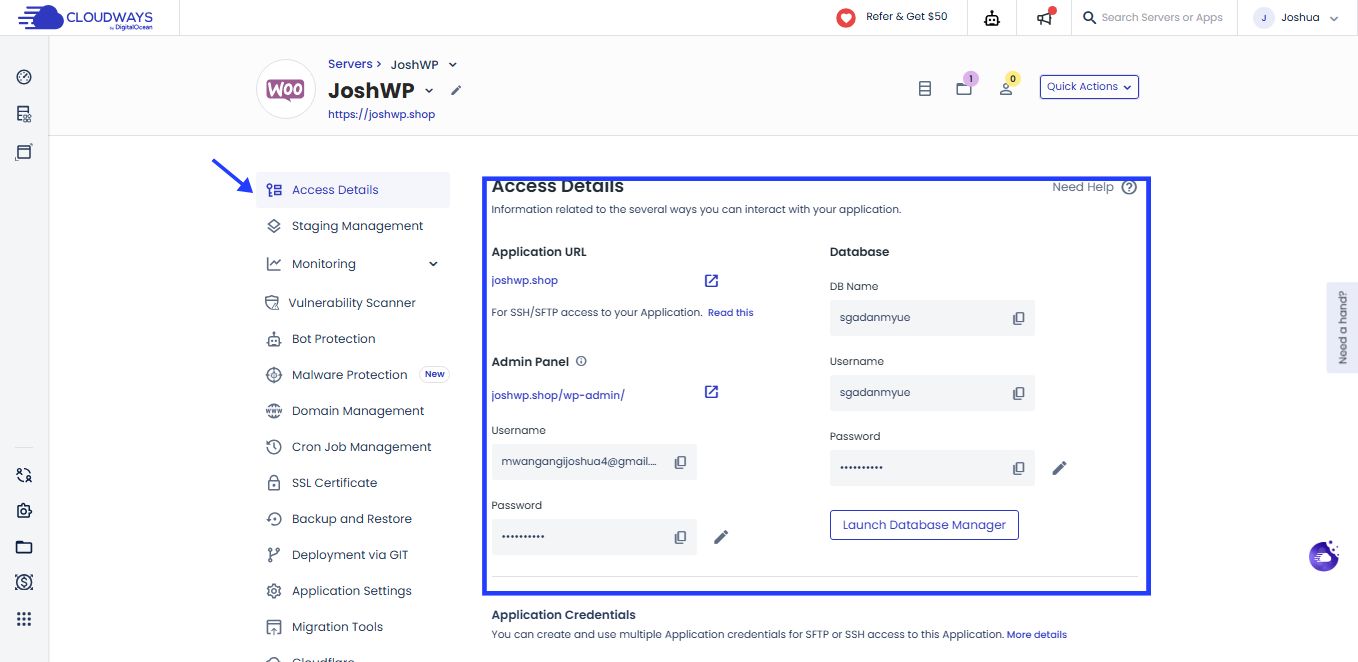
Step 5: Access Your WordPress Site
- Once your server is ready, go to “Applications” in your Cloudways dashboard.
- Find your newly created WordPress application and click on it.

- In the “Access Details” tab, you’ll find your WordPress admin panel URL, username, and password.
- Use these credentials to log into your WordPress admin panel.
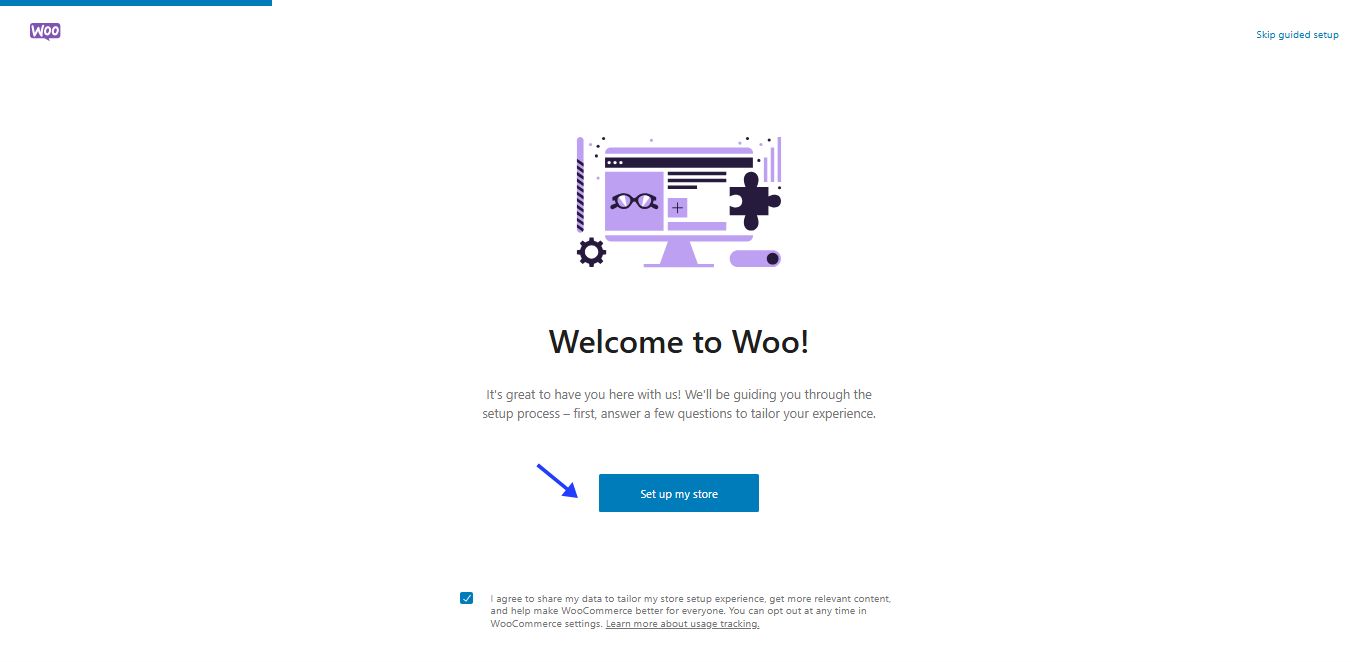
Step 6: WooCommerce Setup Wizard
- After activation, the WooCommerce setup wizard will start automatically.
- Follow the wizard to set up your store details, payment methods, shipping, and other basic configurations.
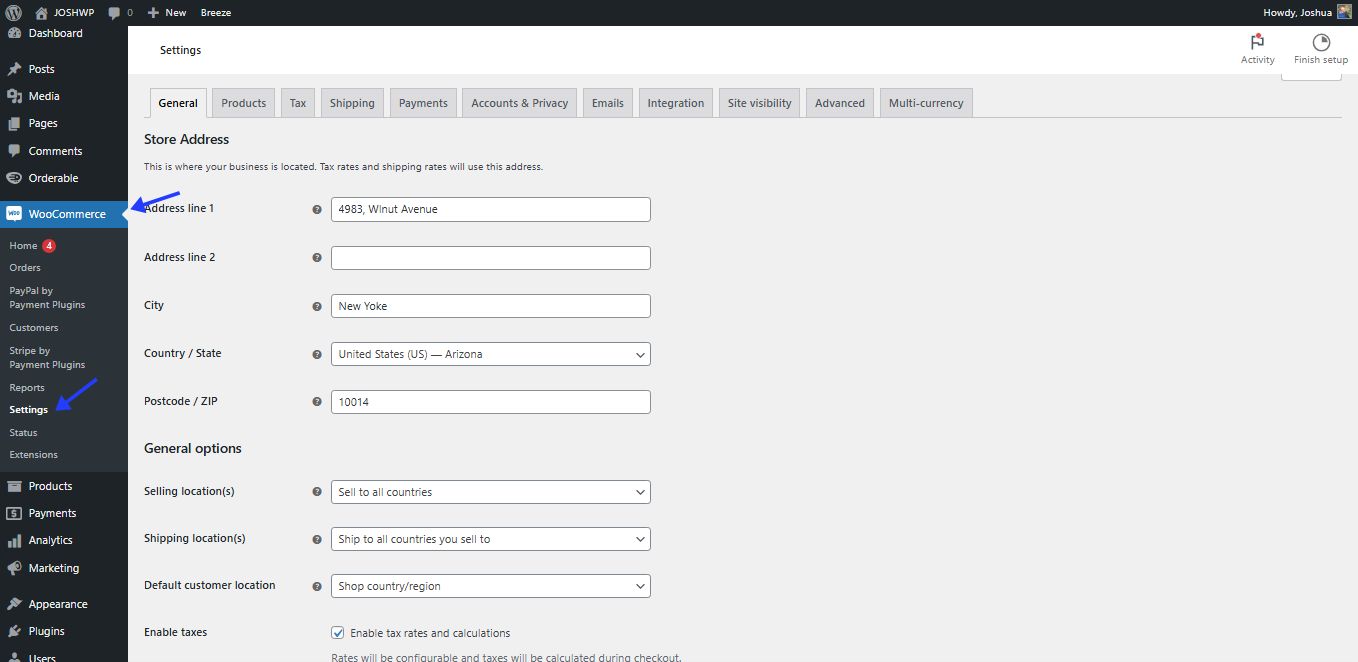
Step 7: Configure Your Store
- Once the wizard is complete, you can further customize your store.
- Go to “WooCommerce” > “Settings” in your WordPress dashboard to configure more detailed options.
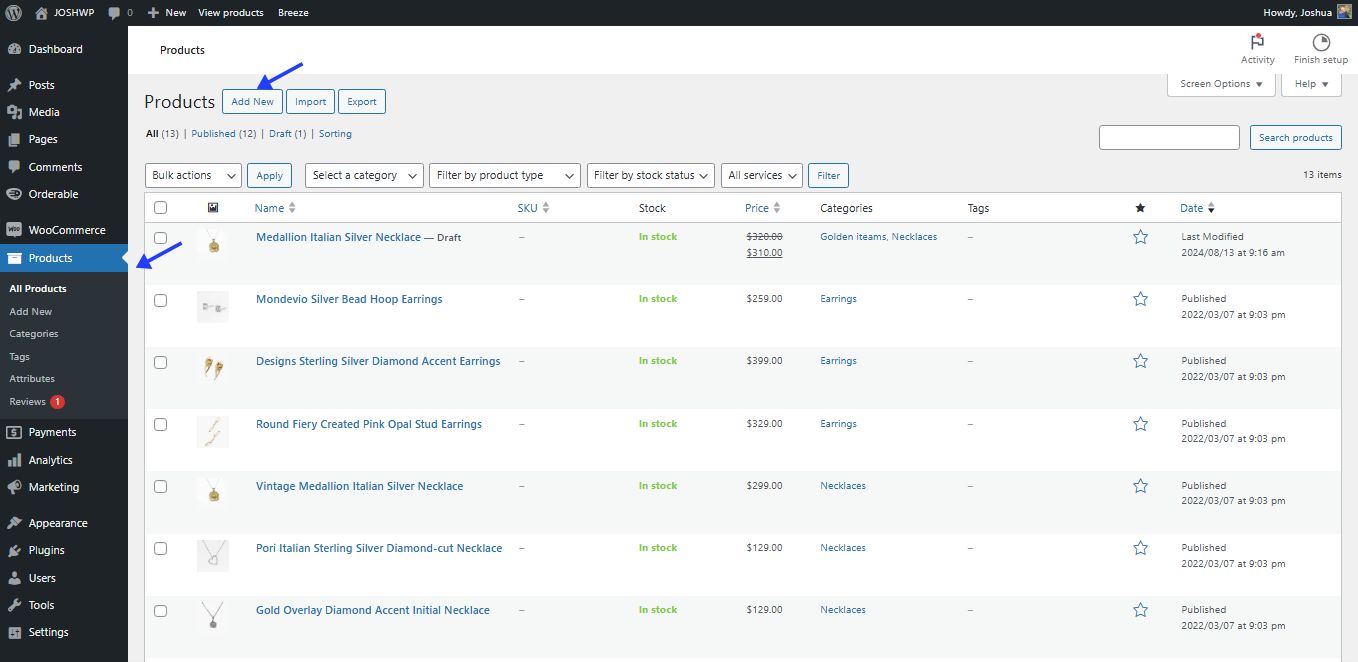
Step 8: Add Products
- To add products, go to “Products” > “Add New” in your WordPress dashboard.
- Fill in the product details, set prices, upload images, and publish your products.
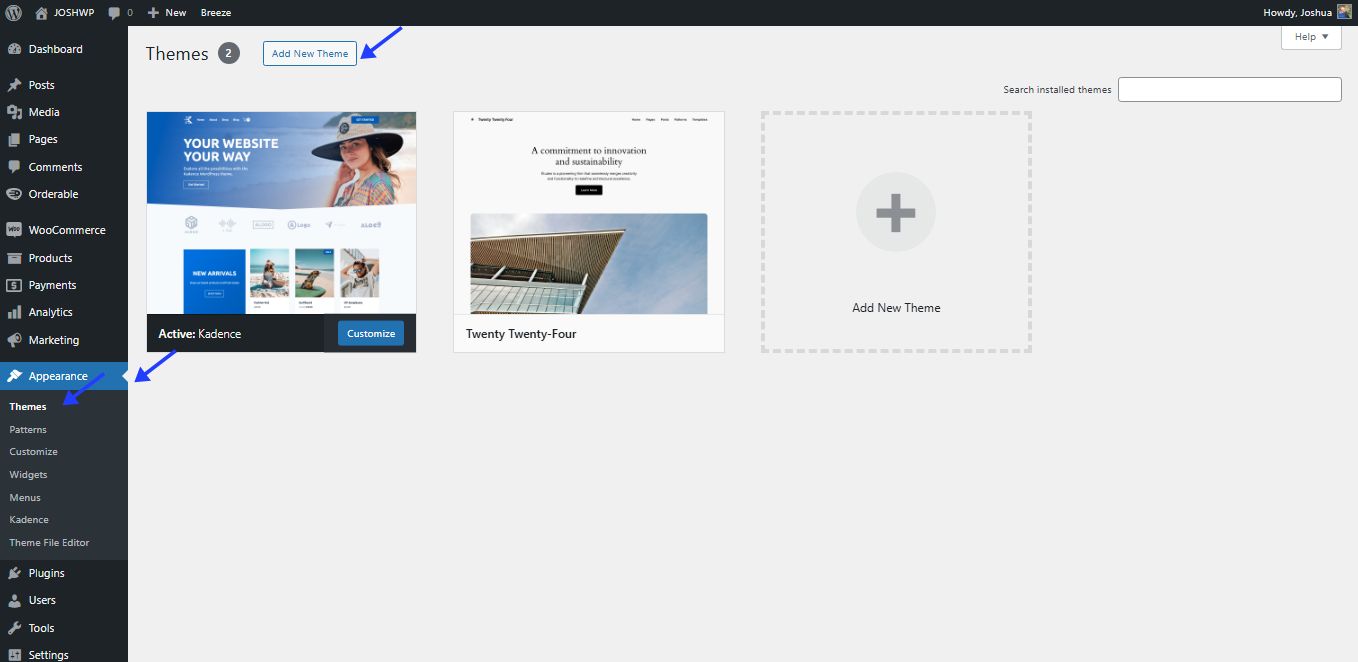
Step 9: Choose and Customize a Theme
- Go to “Appearance” > “Themes” to choose a WooCommerce-compatible theme.
- You can customize your theme by going to “Appearance” > “Customize”.
Step 10: Optimize Performance
- In your Cloudways dashboard, enable Varnish caching for your application.

- Install and configure a caching plugin like Breeze (Cloudways’ own caching plugin) for additional performance boost.
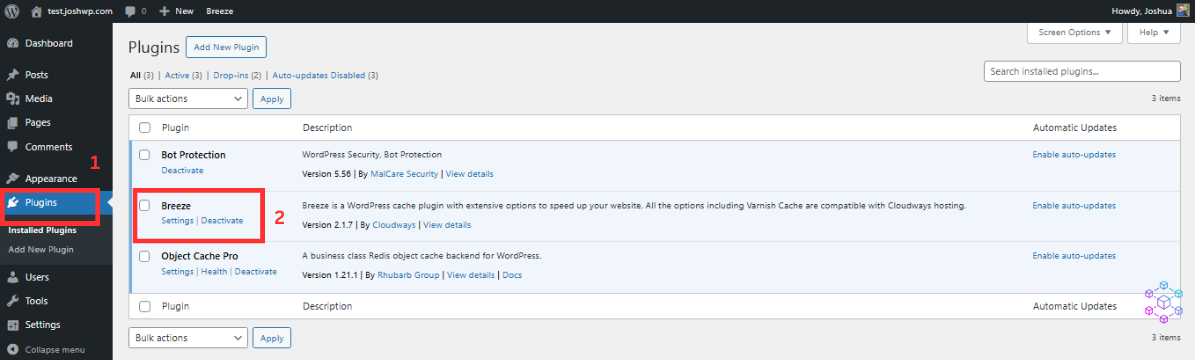
You can read the full article on how to setup the breeze plugin here.
Congratulations! Your WooCommerce store on Cloudways is now set up and ready to go.
How to Manage Cloudways Automated Backups
Under Applications, there is a tab named Backup and Restore. This allows you to take a backup of your application. You also have an option to create on-demand backups before making any changes to your website.
The “Restore” button gives you control of which backup version to restore to your application.
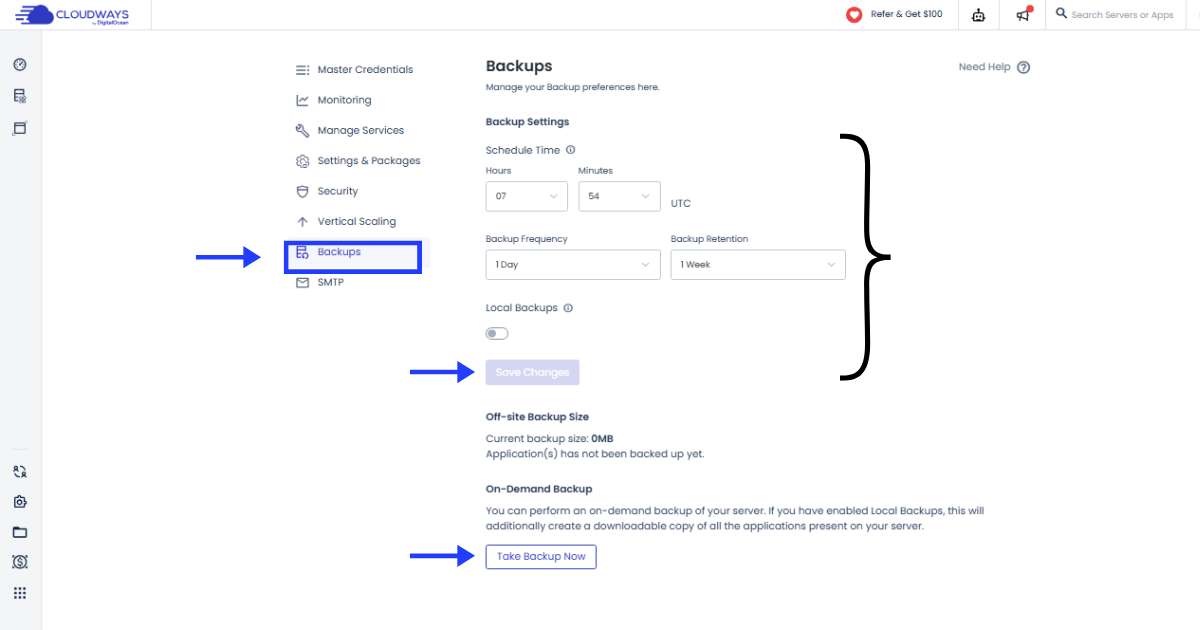
You can find more backup settings under the “Server Manager” which gives more control of the scheduling time, backup frequency, and the backup retention duration.
Cloudways Billing and Account Management
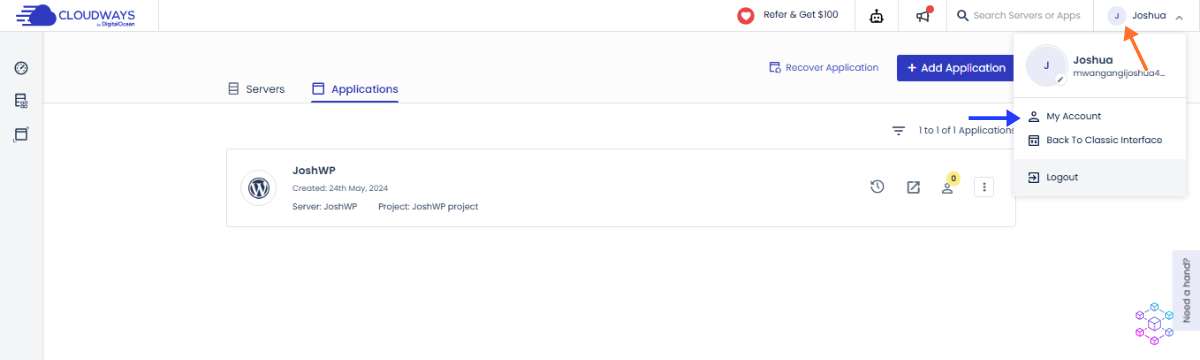
To manage your Cloudways and DigitalOcean account settings;
- Click on the avatar at the right-hand side of the header section. On the drop-down, select the ‘Account’ option
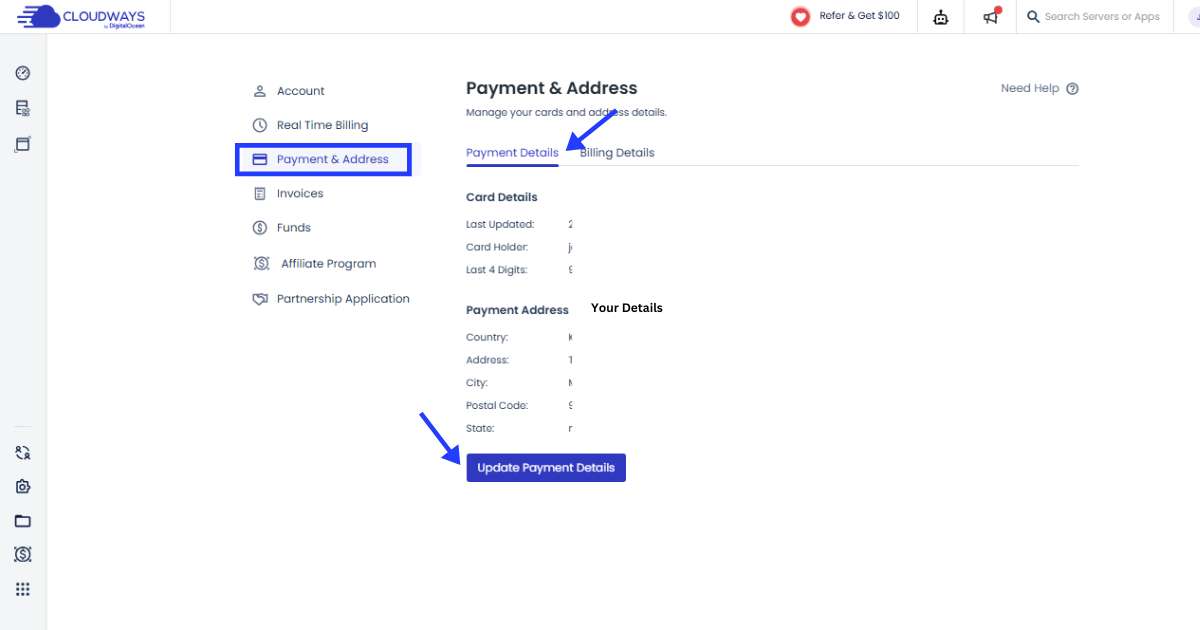
- You will be directed to an ‘Account’ Tab with different options. Select the ‘Payment & Address’ option to manage your payment details. Here you can update your payment details when needed.
- To see your real-time usage, click on the ‘Real Time Billing’ option. Here you will see information on the total charge for the service thus far.

To avoid unnecessary issues, make sure to have enough credit on your serve and enough funds on the card used for billing.
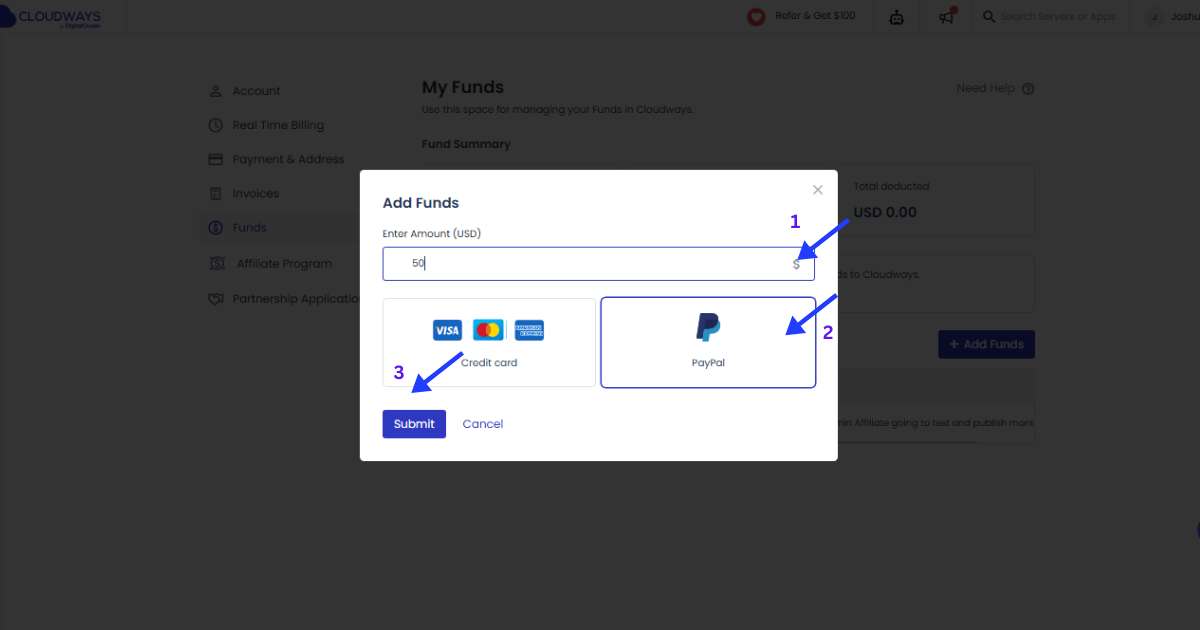
To add funds to your account, click on the ‘Funds’ section. Now click on the ‘Add Funds’ button.
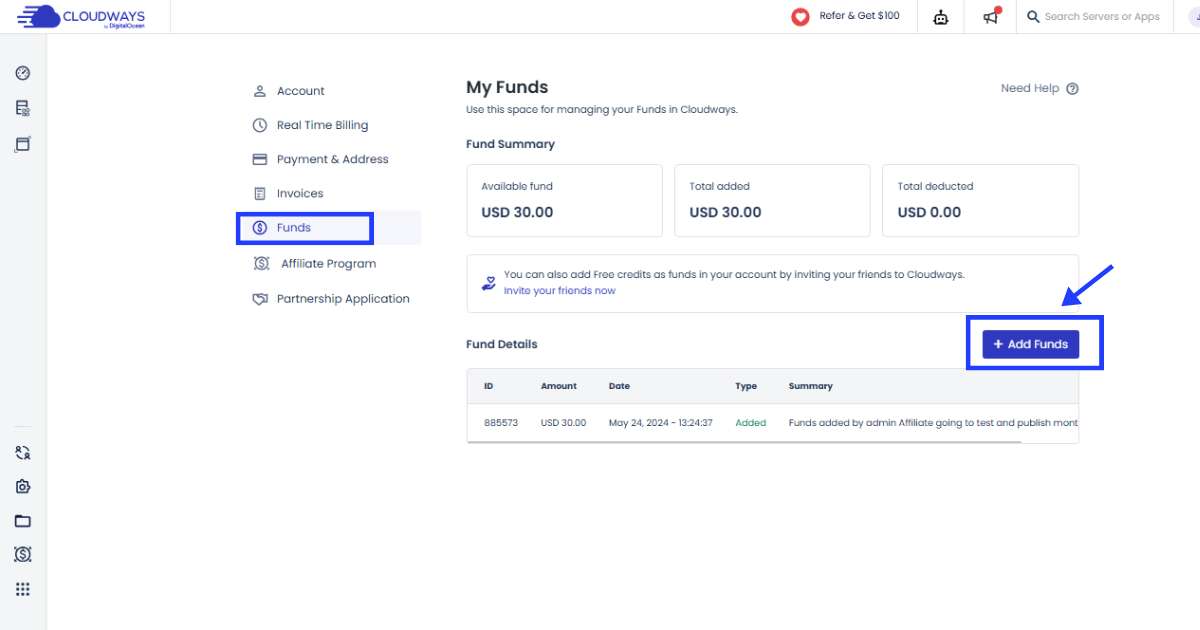
A pop-up screen will appear on which you can choose your preferred top-up method. Enter the amount you wish to add and then, click on the ‘Submit’ button and continue with the next prompt to complete the payment.
Disclosure: We may earn commission for purchases that are made by visitors on this site at no additional cost on your end. All information is for educational purposes and is not intended for financial advice. Read our affiliate disclosure.